Ground Truths#
Profiles: Model Creator, Data Scientist
As a model creator or data scientist, the first step in creating and publishing a machine learning model using AI Studio is to create a ground truth.
This page explains the ground truth functionality in AI Studio.
Reference: If you are looking for step-by-step instructions on how to build a sentence-level or document-level model in AI Studio, including creating ground truths, see the following:
How to Create a Document-Level Classification Model in AI Studio.
How to Create a Sentence-Level Classification Model in AI Studio.
Introduction#
Ground truths are the basis of machine-learning Models Overview, where a Model learns its behavior from the text extracts and labels in a ground truth set.
Two screens within AI Studio allow you to manage ground truths:
Ground Truth Overview screen, which allows you to create, edit, and delete ground truths.
Edit Ground Truth screen, which allows you to configure your ground truth, create and modify candidate sets, and start labeling your documents.
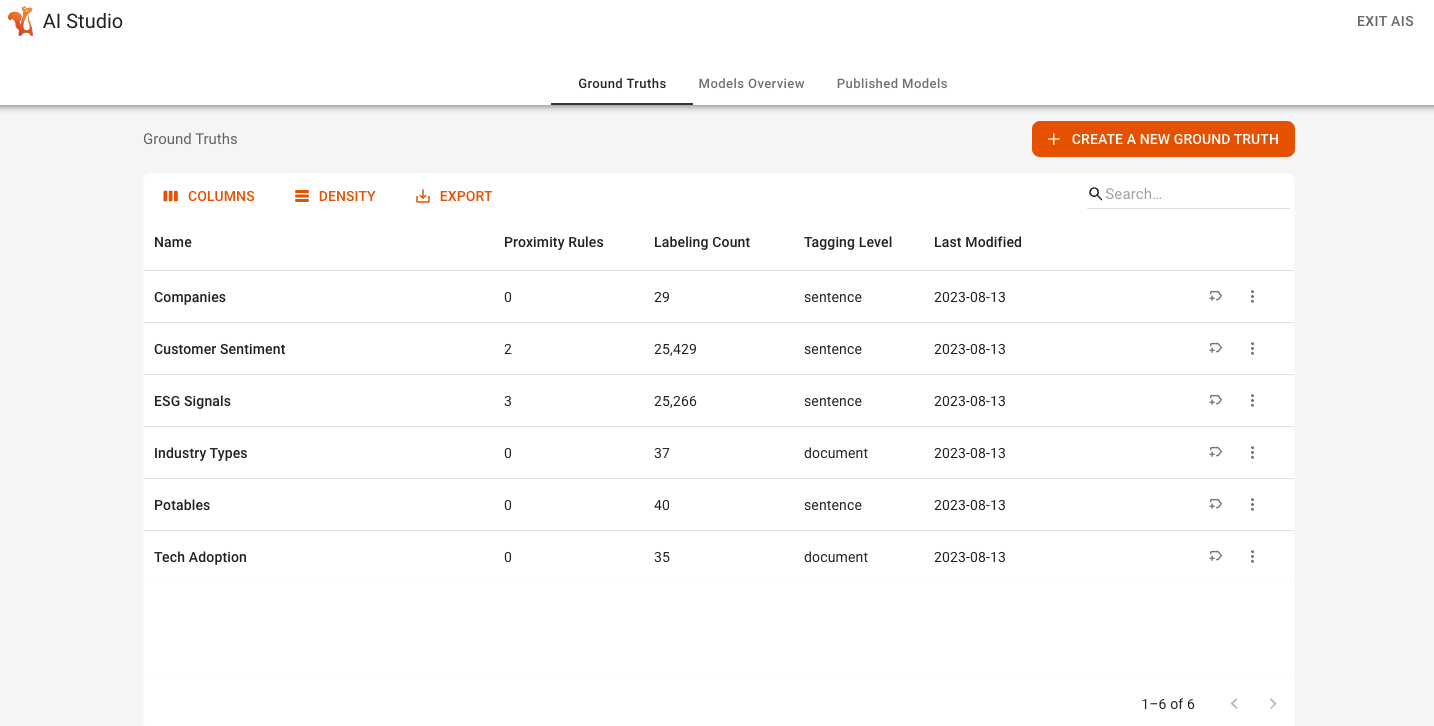
Ground Truths Overview Screen#
This is the first screen you see when you open AI Studio, listing all ground truths within a project, as shown in the screenshot below:
Note: If your project does not have an existing ground truth, you will not see this screen when you open AI Studio, instead you will be prompted to create a new ground truth.
The Ground Truths overview screen shows you a list of ground truths and associated information and also allows you to perform the following actions:
Create a new ground truth by clicking the orange button in the top right corner of the screen.
Edit an existing ground truth by clicking the edit icon next to the three dots menu.
Delete an existing ground truth by clicking the three dots menu and selecting Delete.
Create a New Ground Truth Modal Window#
When you click the Create a New Ground Truth button, a modal window opens as shown below:
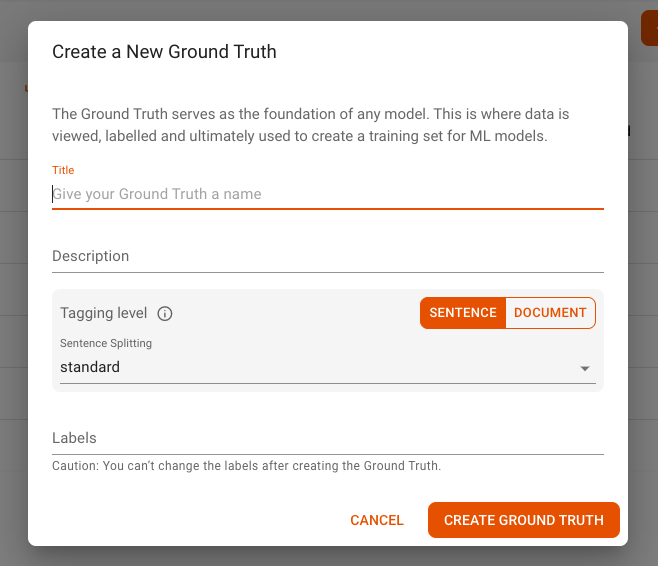
This allows you to configure your new ground truth options, including the following:
Title: Title of the ground truth as it will appear in AI Studio.
Description: Description of the ground truth.
Tagging Level: Level on which the extracts get tagged in the ground truth, sentence level (default) or document level.
Sentence Splitting: Select the sentence splitting method to use for the ground truth. The default is standard. For RSS feeds, MRN is recommended.
Labels: Create at least two labels to start. Type your label name and press Enter to add it to the list.
Hint
It is important to plan your labels in advance, as labels cannot be added to a ground truth after it has been created.
Edit Ground Truth Screen#
Once you’ve created a ground truth, you can edit it by clicking the edit icon next to the three dots menu on the Ground Truths overview screen.
There are four primary areas within the Edit Ground Truth screen UI, as shown in the screenshot and the corresponding list below:
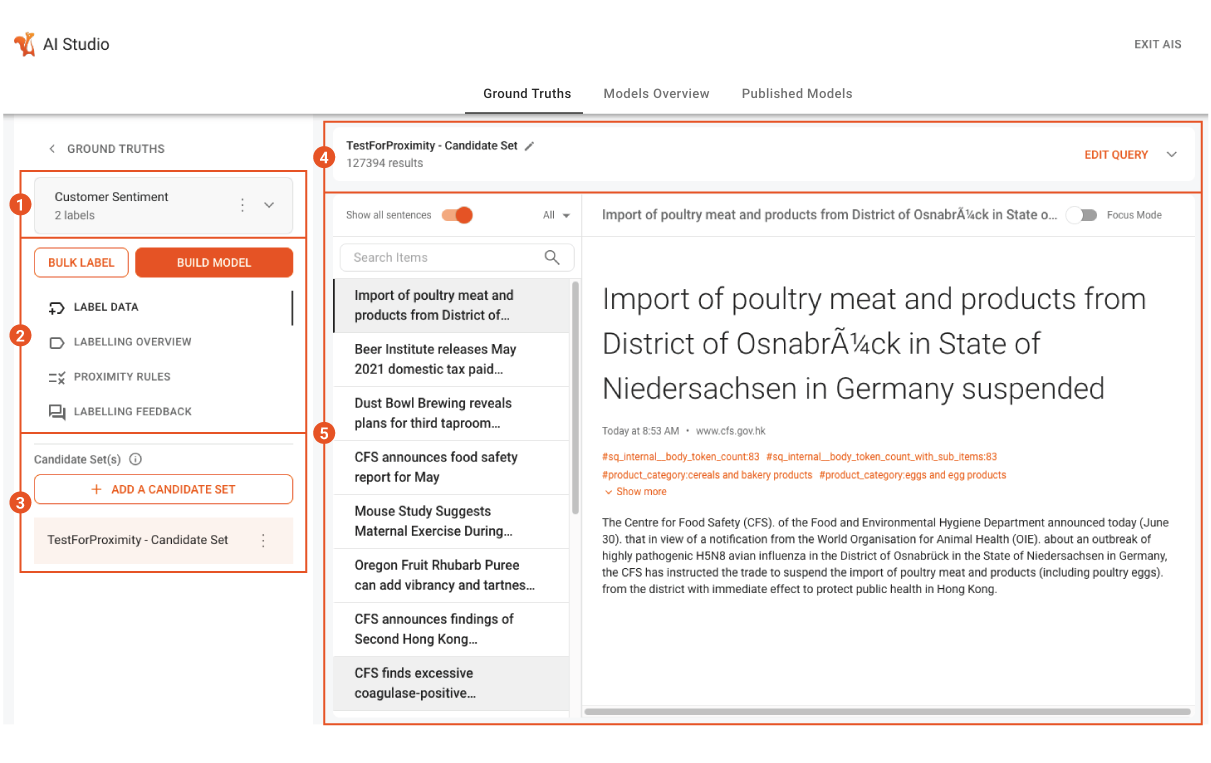
Ground Truth properties.
Labeling
Candidate Sets.
Edit Query.
Document list and preview.
1: Ground Truth Properties#
The Ground Truths properties section allows you to edit the ground truth title and description, as shown in the screenshot below:
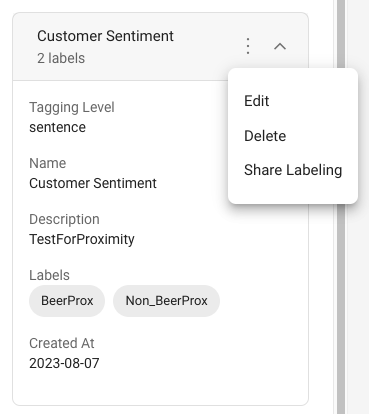
Clicking the three dots menu allows you to edit the ground truth, share labeling with non-administrative project users, or delete the ground truth.
Reference: Learn more about Share Labeling Permissions.
Caution
Once the ground truth is created, you cannot change the tagging level or labels.
2: Labeling#
The Labeling section allows you to start labeling your ground truth.
Note: All labeling requires a candidate set, as described in the next section (3).
There are four labeling options, plus a Bulk Label button, as shown in the screenshot below:
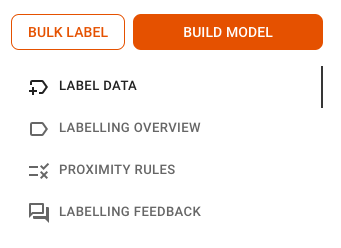
Label Data allows you to manually label data that appears in the document list and preview section (5).
Labelling Overview opens a screen that allows you to see all items to which your different labels have been applied.
Proximity Rules will display active proximity rules for the ground truth and offer the option to Create a Proximity Rule.
Labelling Feedback opens a screen that shows your processed and unprocessed feedback from project users.
Reference: Learn more about Bulk Labeling.
3: Candidate Sets#
The Candidate Sets section lists all candidate sets, which are sets of text extracts that you use to generate your ground truth.
All ground truths require at least one candidate set, with a default candidate set created when you create a new ground truth, as shown in the screenshot below:
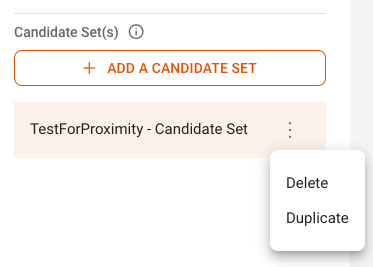
Note: The default candidate set is named the same as your ground truth.
You can click the Add a Candidate Set button to create a new candidate set, or click the three dot menu next to an existing candidate set to duplicate or delete it.
Selected candidate sets are edited in the Edit Query section (4).
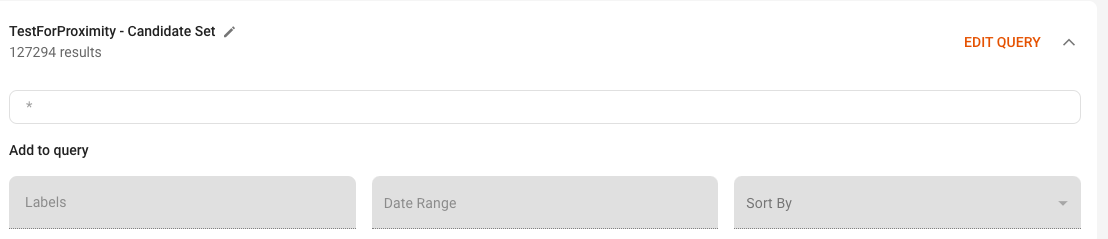
4: Edit Query#
All candidates sets are built using a query, which can be edited by clicking the dropdown arrow in the Edit Query section.
You can use any type of Squirro query syntax within the search bar, from boolean searches (AND, OR, NOT) to field or entity searches.
Reference: Learn more about Query Syntax.
You can also filter by labels or date range using the provided fields, and sort the results by relevance or date, as shown in the example screenshot below:
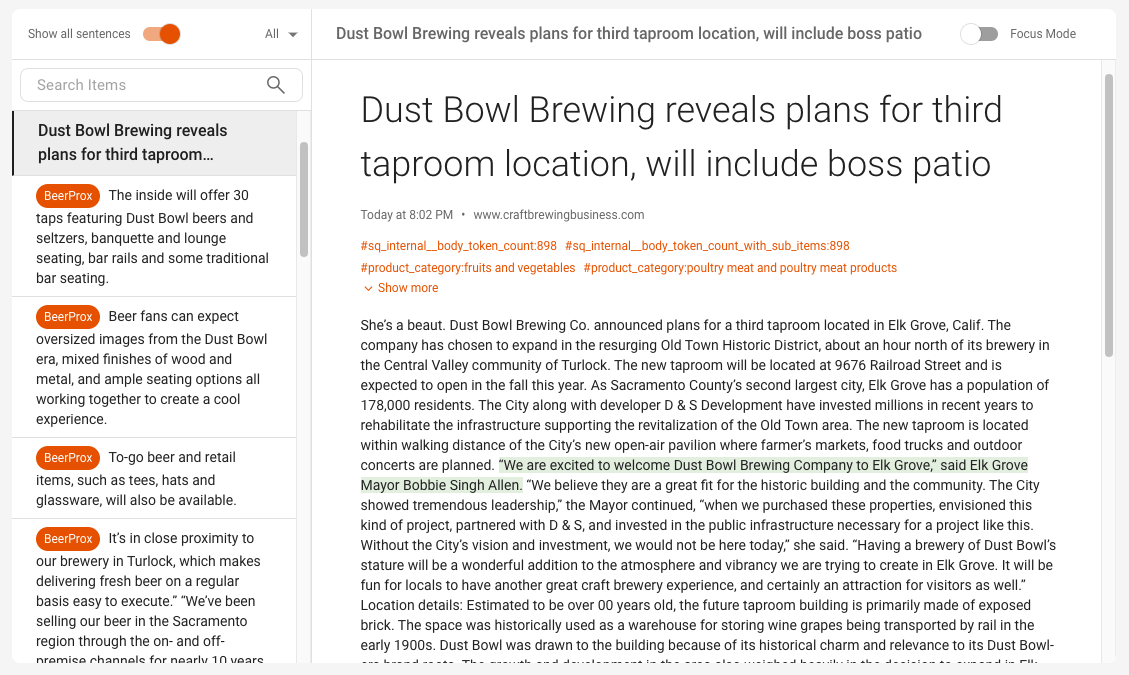
5: Document List and Preview#
The Document List and Preview section shows you the documents that match your query and allows you to preview the documents and assign labels.
When you select a document, you can see the document title, the highlighted text extract, and the document preview.
When an unlabeled document is selected, you’ll have the option to assign a label to the document at the document or sentence level, depending on the tagging level of your ground truth.