Squirro Chat Data Quick-Start Guide#
Feature status notice
The Squirro Self-Service platform (start.squirro.com) is still in development. As we continue to refine and improve it, you may encounter some inconsistencies or issues. Your feedback is really important to us in making this feature the best it can be. If you experience any problems or have suggestions for improvement, visit the Squirro Support website and submit a feedback request.
This guide provides an introduction to Squirro Chat Data and instructions on how to install and use the application. The application is available from start.squirro.com.
Squirro Chat is offered in two version, Data and Web. This guide covers the Data version. For information on Squirro Chat Web, see Squirro Chat Web Quick-Start Guide.
Introduction#
Squirro Chat is a preconfigured Squirro application that allows you to query your own project data through an interface powered by Squirro’s information retrieval stack and a state-of-the-art large language model (LLM).
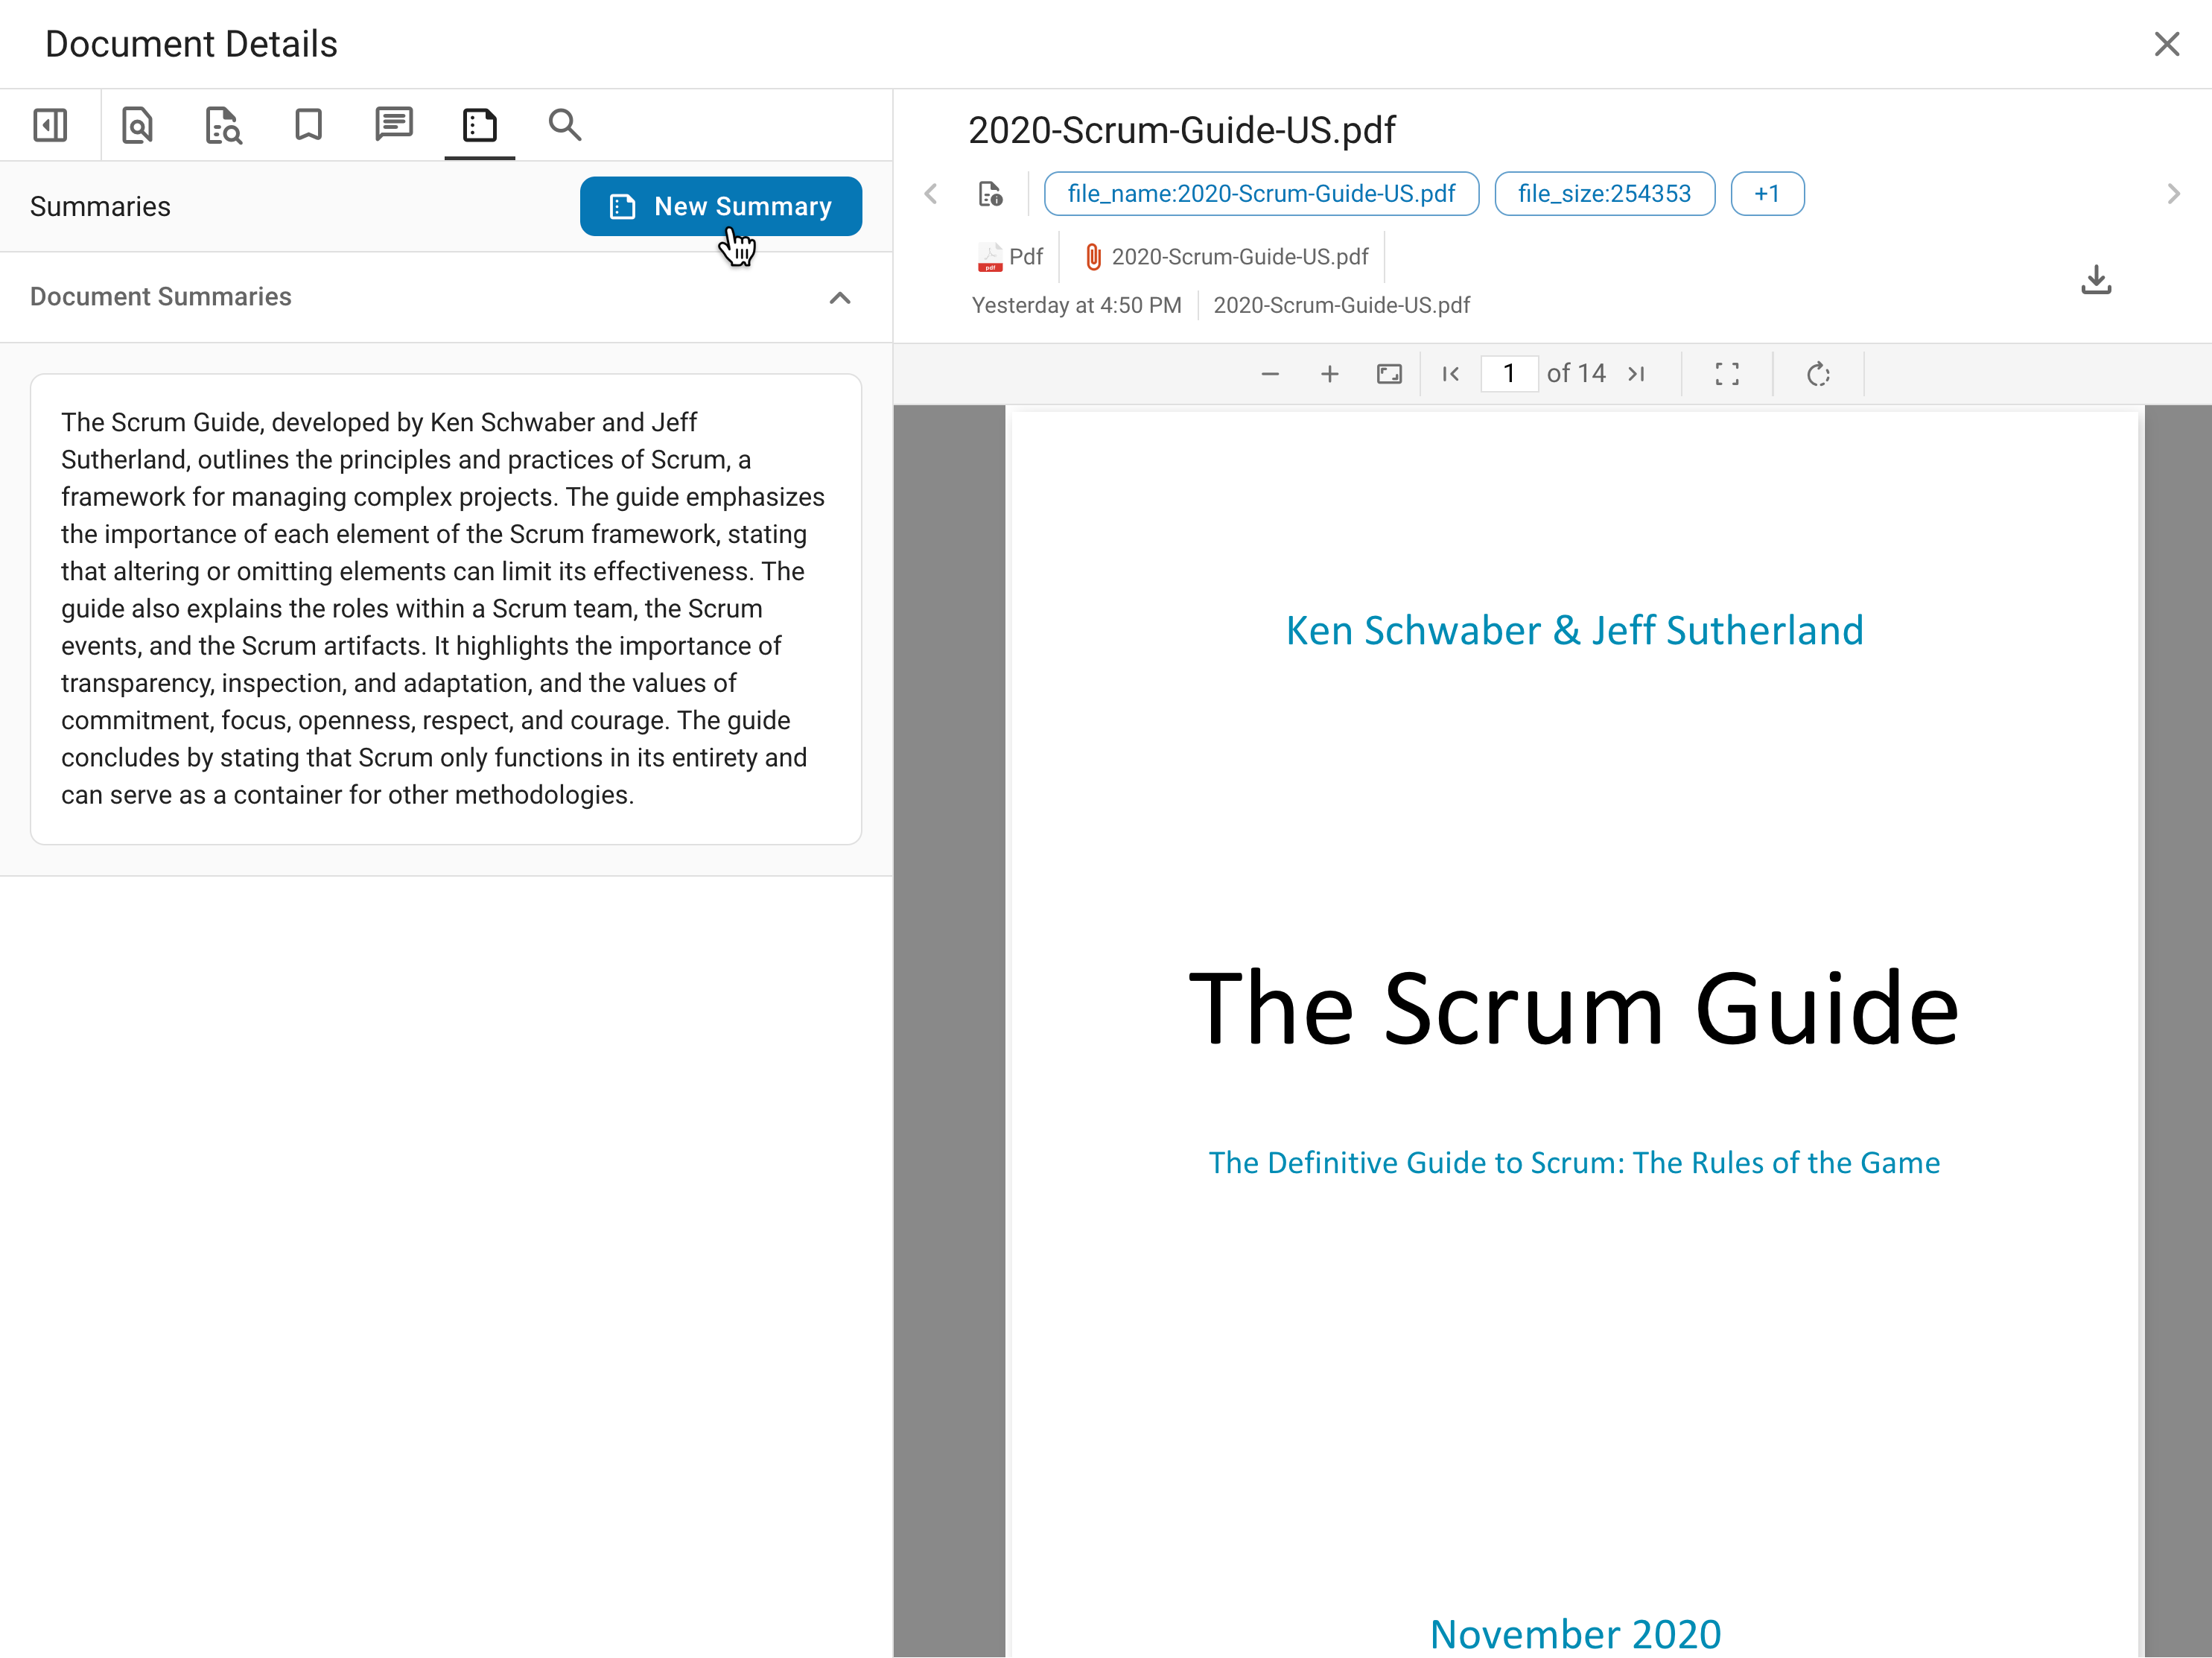
After installing the application, you access an intuitive digital assistant interface that allows you to interact with your data using natural language queries and summarize the content of a document. For more information, see the Item Detail Widget page.
Who This Guide is Designed For#
This quick-start guide is designed for end users who wish to trial the Squirro Chat Data application found at start.squirro.com.
Process Overview#
The following steps are needed to install and use Squirro Chat:
Register for a SquirroID.
Install the application in the Squirro cloud.
Upload your data.
Ask Squirro Chat.
(Professional) Connect additional data sources.
Register for a SquirroID#
To install a copy of Squirro Chat, you’ll first need a SquirroID.
If you don’t have one yet, see How to Register for a Squirro ID for instructions.
Take Squirro Chat for a Test Drive#
If you want to quickly see what Squirro Chat can do without installing the application as described in this guide, you can now Test Drive a Squirro Chat application.
This allows you to safely and securely upload your own data or crawl your own website and see how Squirro Chat works.
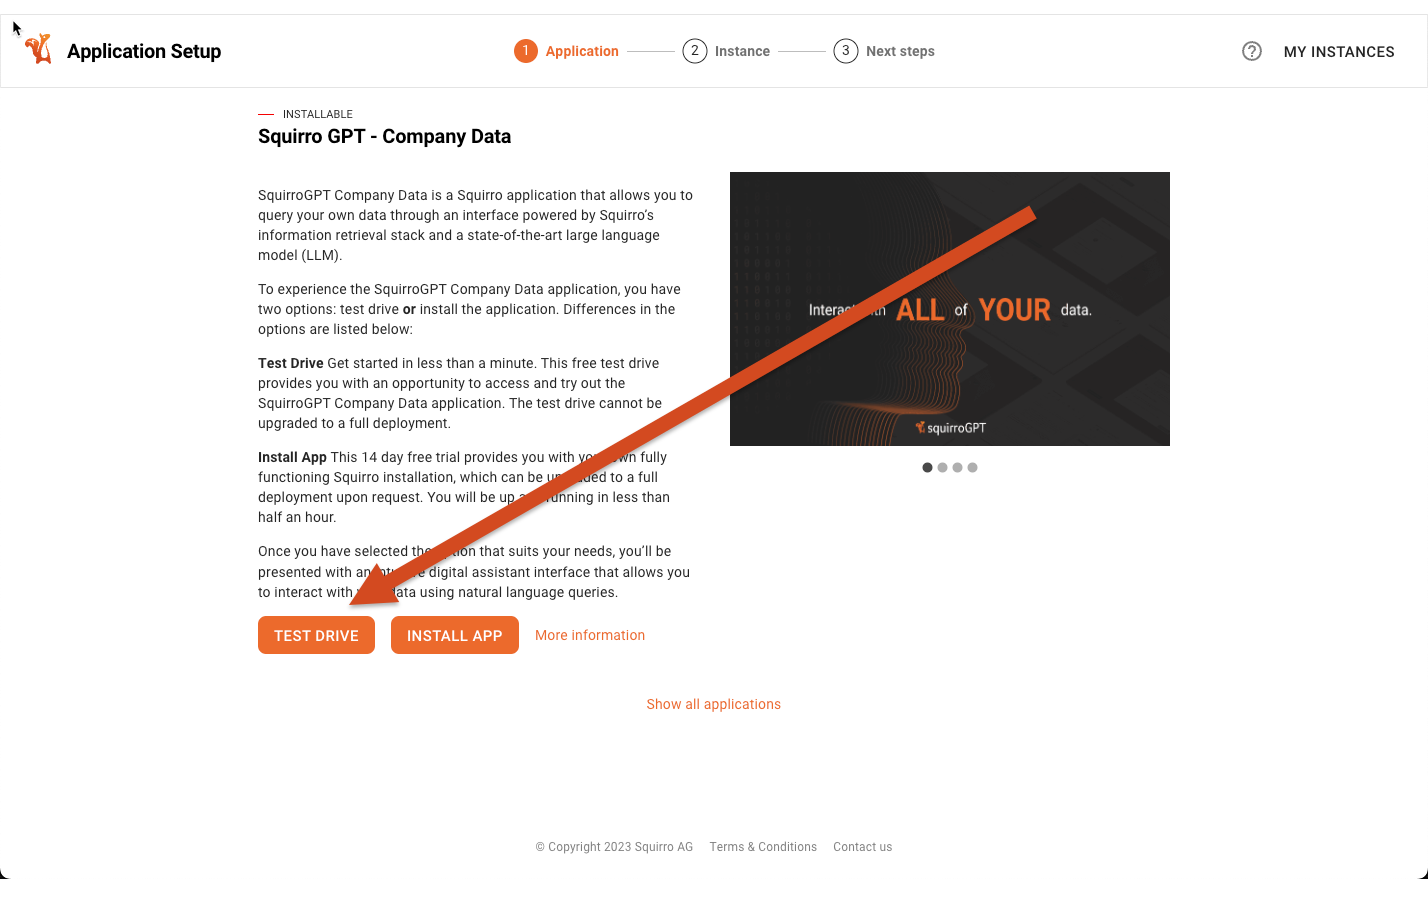
To learn more, see How to Launch a Test Drive.
Install the Application in the Squirro Cloud#
To install your copy of Squirro Chat in the Squirro cloud, follow the steps below:
Navigate to start.squirro.com.
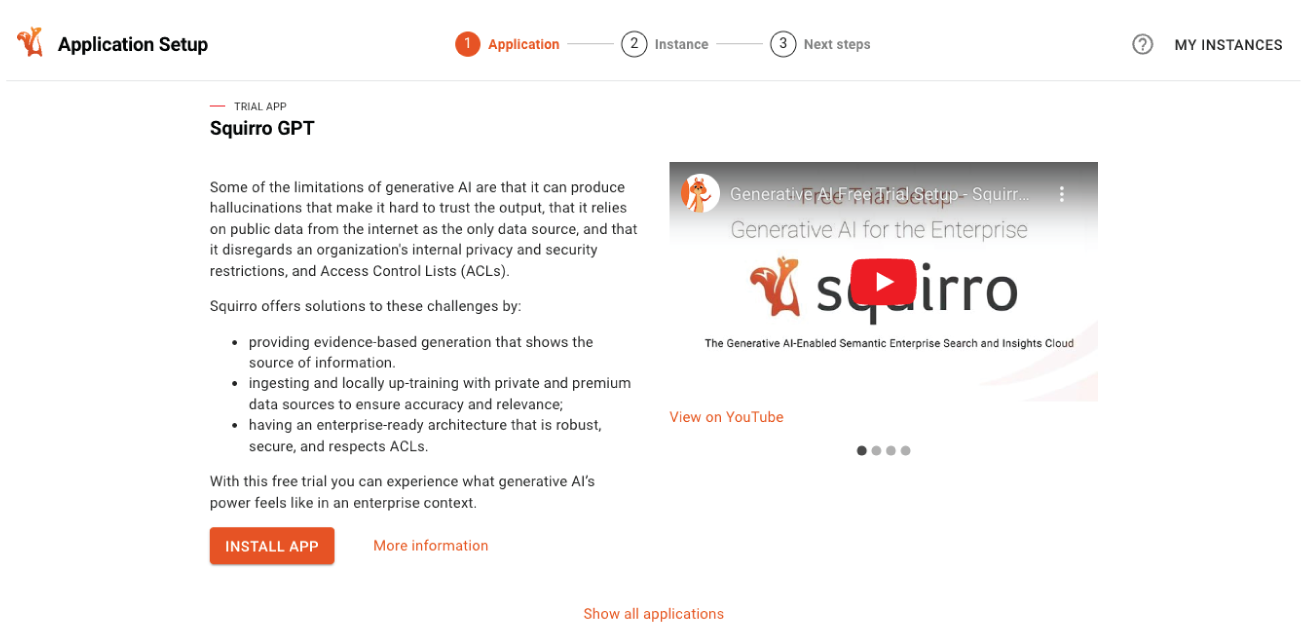
Click the tile for Squirro Chat - Data, as shown in the screenshot below:
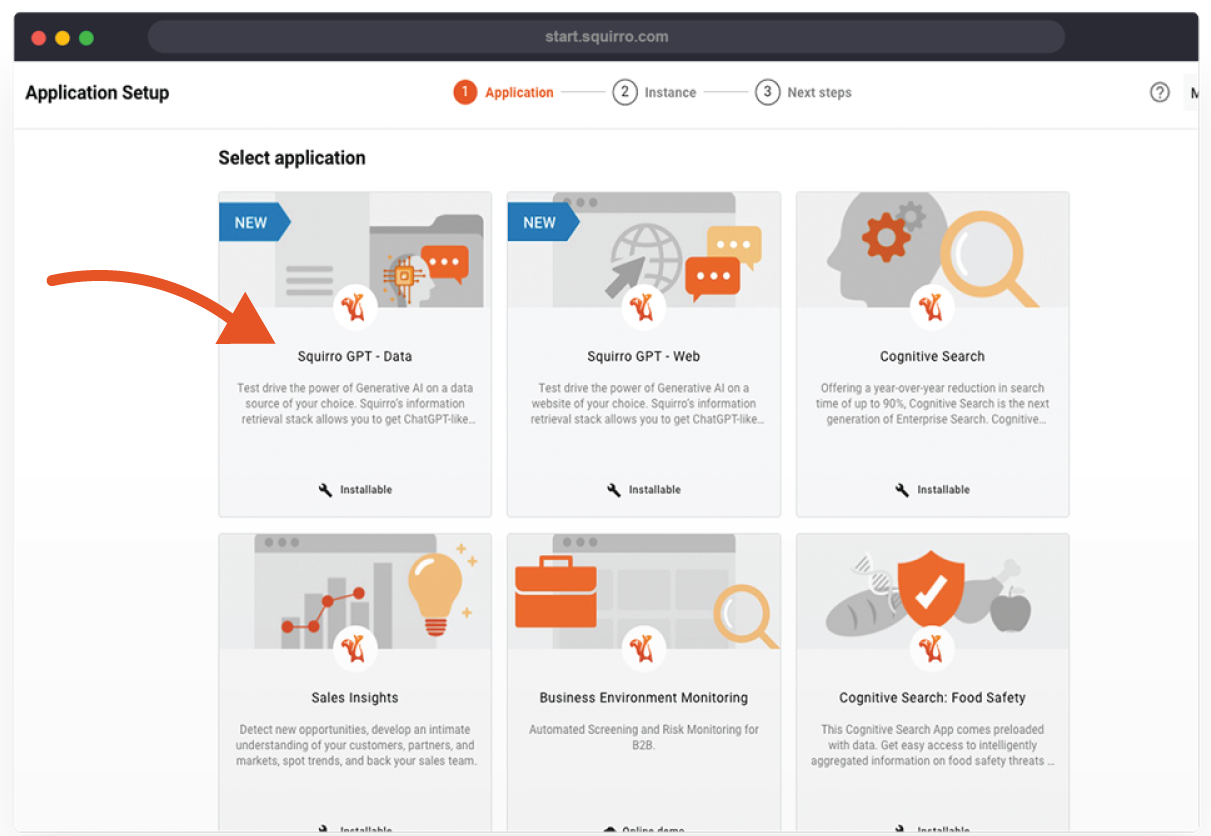
Click Install App.
Select the instance you’d like to install your application on, or scroll to the bottom and click Add a new instance to create a new instance the application will be added to.
Click Send Form to submit your information and install your new application.
When it’s done installing, you can click your new instance, which will open with your new Squirro Chat application.
Note: If you have any issues installing Squirro Chat, contact Squirro Support for help.
Upload Your Data#
To use Squirro Chat, you’ll need to start by uploading data. To do so, follow the steps below:
Open your newly-installed application after logging in with your Squirro ID. If you do not have a Squirro ID, see the How to Register for a Squirro ID page. The first time you open Squirro Chat after installation you’ll be presented with a welcome screen that includes a Connect Data button, as shown in the example screenshot below:
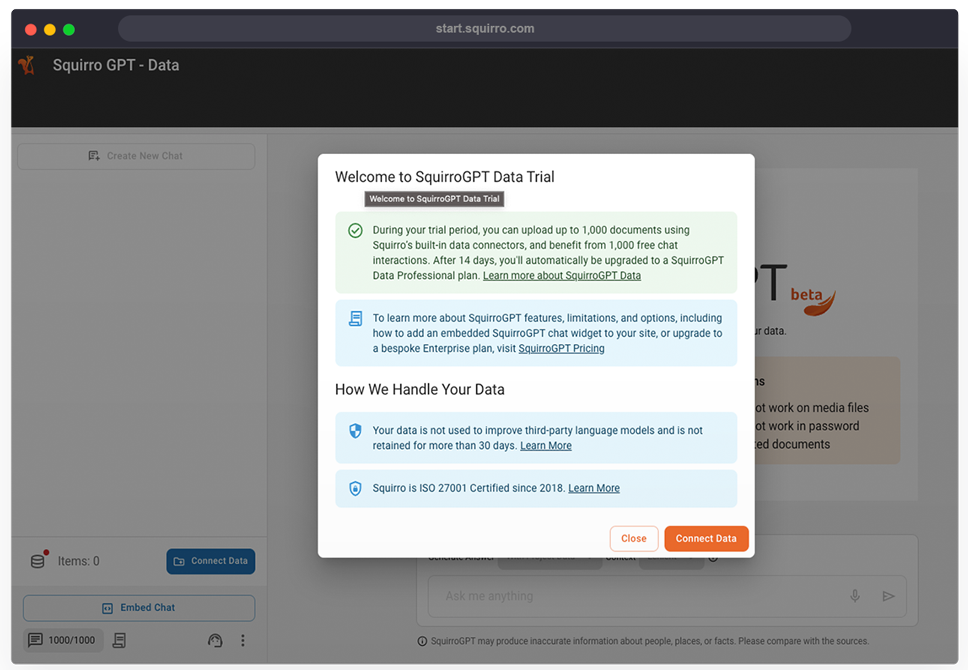
Click Connect Data, which launches the following screen:
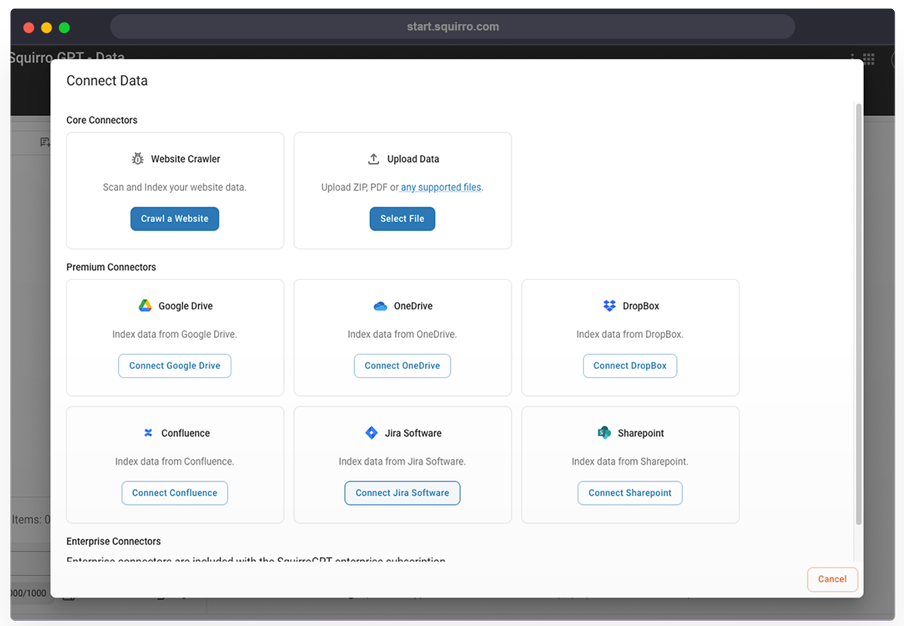
Select your data source to connect your data.
Note
For trial users, Upload Data will be your only available option.
After uploading your documents, verify that your files have been uploaded properly by checking the Items display in the bottom-left corner of the UI.
Upload Data - Acceptable Document Types#
The most popular connector for Squirro Chat is the Upload Data connector, which allows you to upload common document types from your local machine.
This connector allows for the following common document formats, including Microsoft Office and OpenOffice file types:
.CSV
.DOC, .DOCX
.ODP, .ODS, .ODT
.PDF
.PPT, .PPTX
.RTF
.TXT
.XLS, .XLSX
Warning: Password protection on files must be removed before upload, otherwise they will not load correctly.
Reference: To learn more about supported document types, see Searchable File Types.
ZIP Files#
You can also upload ZIP files containing multiple documents. The ZIP file will be extracted and each document will be indexed separately.
Warning: ZIP files can contain multiple different document types together, but cannot include nested folders.
Understanding the Admin Interface#
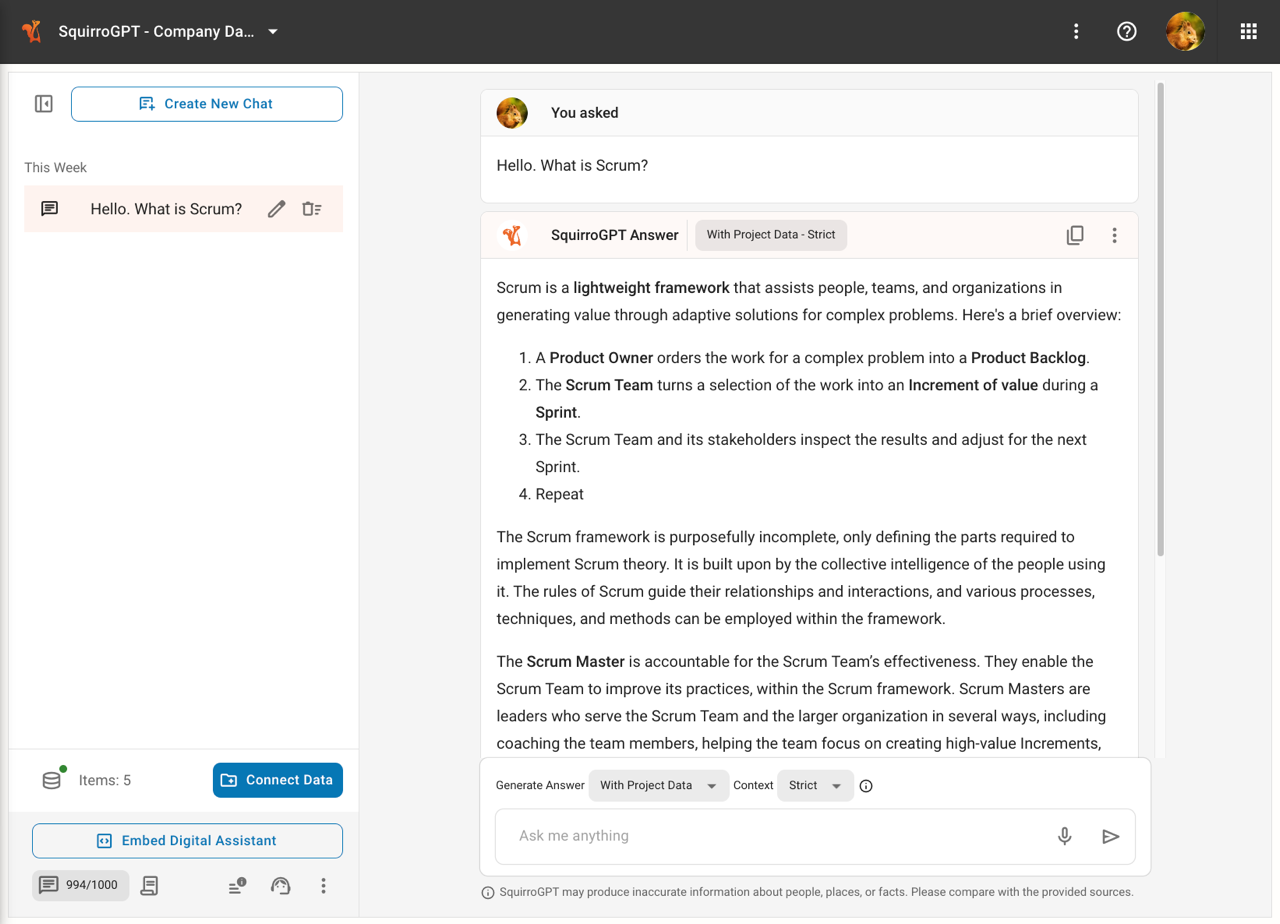
After connecting your data, you’ll be presented with a digital assistant interface that allows you to interact with your data.
The different parts of the Squirro Chat UI are labeled and explained below:
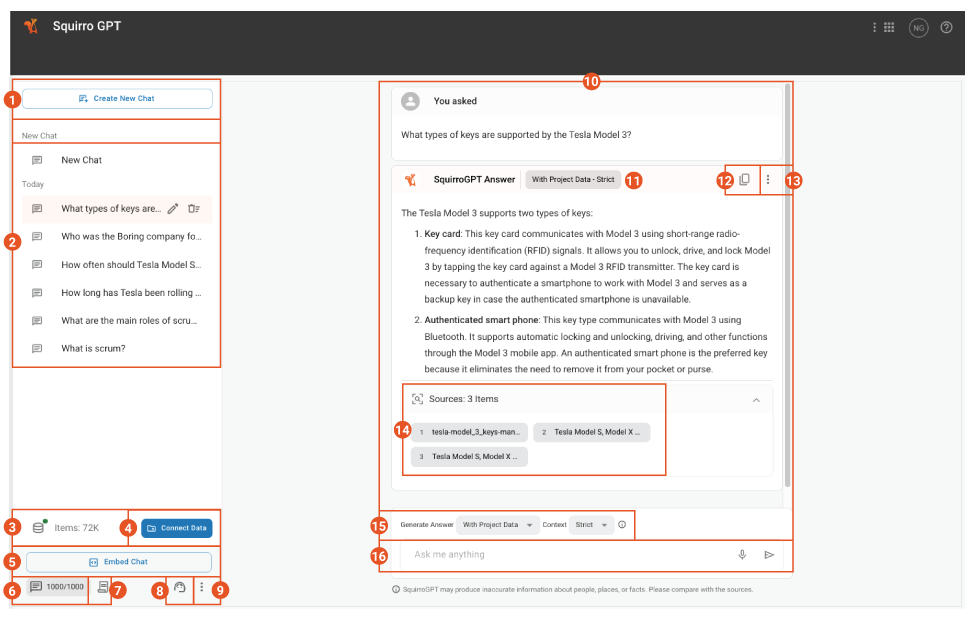
Create a New Chat: Start a fresh conversation with Squirro Chat.
Chat Selection: When multiple chats are present, select between them here. Hovering over the chat will display a menu that will allow you to rename or delete the chat.
Indexed Items: Displays the number of files you’ve indexed. If green, your documents have indexed correctly. If red, your documents have not indexed correctly. Click the server icon to view your connected data sources.
Connect More Data Sources: Upload additional documents, or for professional subscriptions, connect to your cloud documents. See the Notes on Data Security section later on this page for more information.
Embed Chat: Opens the modal window that provides customization and embedding options for the Squirro Chat digital assistant.
Queries Remaining: Number of queries remaining on your free trial or monthly subscription plan.
Change Subscription Info: Links to a Squirro contact form where you can request changes to your Squirro Chat subscription.
Contact Squirro Support: Open a Squirro support ticket directly from the UI.
Additional Menu Items: Click the three-dot menu to access additional menu items, including the ability to clear all chats and a link to this documentation.
Chat Areas: Your queries and responses from Squirro Chat will appear here.
Answer Grounding: When Squirro Chat generates an answer, it will display the grounding strictness used.
Copy Response: Click the icon to copy the generated Squirro Chat response to your local clipboard.
Provide Feedback: Click the three dots to provide thumbs up or down feedback on the quality of the Squirro Chat response.
Sources: When the generated answer can be tied to a specific source (or sources), the source(s) will be displayed here. Click a source to open it.
Grounding: Select between levels of grounding strictness. See the explanation for this feature in the section below.
Chat Input: Type your chat query here, or click the Microphone icon to speak your query.
Grounding#
Squirro Chat allows you to choose one of three evidence-grounding options for each chat query submitted.
These options include the following:
With Project Data Strict: Adheres as strongly as possible to the retrieved sources, limiting answers generated from the LLM’s internal knowledge.
With Project Data Lenient: If it feels it needs to, supplements the information from the provided sources with its internal knowledge to provide a more comprehensive answer. This can be useful to fill in small information gaps in the retrieved documents. The risk in using this option is an elevated chance of hallucinations.
Without Project Data: Forwards the user question (along with the current chat history) to the underlying LLM to retrieve an answer. This can be a useful tool to showcase what the answers would have been without Squirro’s source grounding.
How to Use Squirro Chat#
As an end user, getting started with Squirro Chat is easy. Simply type your query into the chat input field and start a conversation.
While using it is easy, getting the most out of the experience can sometimes require a knowledge of best practices.
Caution
Even with best practices, like all generative technology, Squirro Chat may produce inaccurate information about people, places, or facts. Please validate answers against the source material.
To learn more about how to get the most out of Squirro Chat, see Improving Conversations.
Adding Users#
Note
The term instance and server are used interchangeably. They refer to your root installation of the Squirro platform in the Squirro-managed cloud referred to as Squirro Self-Service.
Adding users is a two-step process:
Users must first register for a SquirroID at start.squirro.com.
Once they have a SquirroID, you must add them to your instance.
1 - Registering for a SquirroID#
Any users you wish to add to your project must first register for a SquirroID.
Reference: For instructions on obtaining a SquirroID, see How to Register for a Squirro ID.
2 - Adding Users to Your Instance#
Users are added to your server via the Cluster page, also known as the My Instances page.
To add users to your instance, follow the steps below:
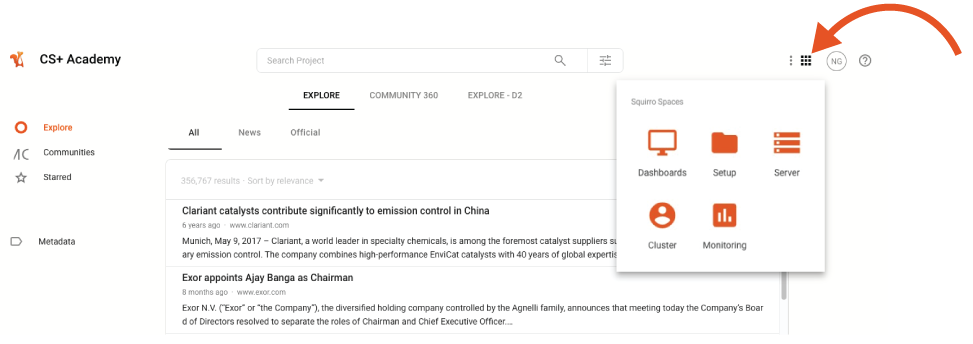
Once logged in to Squirro with your SquirroID, navigate to the Cluster page by clicking the navigation menu in the top-right corner of the UI.
Hover over your instance, and click the three-dot menu that appears, as shown in the screenshot below:

Click Users.
Click Invite Users to add users by email address.
Enter the user’s email address and select the role of Admins and click Send.
Note: At the initial launch of Squirro Chat, the new users must be added as Admins.
Warning
Users may not be automatically notified that they have been added to the project. It is recommended to manually notify users after adding them to the project.
Connect Data Sources (Professional)#
To use your own data with Squirro Chat, you’ll first need to connect your data sources to Squirro.
Data Connector Plan Limitations#
In the Squirro Chat free trial, you’ll have access to basic document upload capabilities.
As part of the professional and enterprise subscriptions, you’ll have access to Squirro’s wide range of data connectors, including, but not limited to:
Microsoft OneDrive
Dropbox
Google Drive
Atlassian Confluence and Jira
Microsoft Sharepoint
Salesforce
Adding Data Sources to Your Project#
To connect data sources, follow the steps below:
Click the Connect Data button in the bottom-left of the Squirro Chat interface.
Select your data source from the list of available connectors.
Follow the instructions to connect your data source.
Reference: For information on Squirro connectors, see Built-In Data Connectors.
Note
If you have any issues connecting your data, contact Squirro Support for help.
Notes on Data Security#
Note the following regarding data security:
Squirro Chat runs on a single tenant utilizing Squirro’s public cloud infrastructure.
On uploading, your data is indexed and enriched.
Your data is encrypted both in transit and at rest.
Squirro Chat combines an information retrieval stack with a large language model (LLM).
During chat generation, portions of your data are exposed to said LLM but are not transferred or stored in the LLM.
Limitations#
Free Trial Limitations#
Squirro Chat is available as a free trial application subject to the following fair usage policy.
Users may:
Perform up to a maximum of 1000 trial Squirro Chat interactions.
Upload up to a maximum of 1000 documents per application, with a maximum of 1GB of documents per user.
Use the application free for up to a maximum of 14 days.
Add up to a maximum of 10 trial users.
Professional Limitations#
Squirro Chat professional limitations are as follows:
Up to 1,000 Squirro Chat interactions per user per month (with a per interaction fee applying afterward).
Upload as many documents as you like, as long as individual files don’t exceed 50MB and the total storage does not exceed 5GB/user.
Additional data connectors of Microsoft OneDrive, Dropbox, Google Drive, and more are available.
Reference: See Squirro Chat Pricing for more information on available plans and pricing.
Browser Limitations#
The Speech to Text feature for the Global Search Bar and Search Widget only works for Google Chrome browsers.
Troubleshooting#
If you encounter any issues while using Squirro Chat, contact Squirro Support for help.