Note Taking#
The Note Taking feature allows project users to perform the following tasks:
Bookmark documents at the document level.
Create sentence-level notes within project documents.
Note
The Notes feature is turned off by default. See the Activating Notes section for information on how to activate it.
Using Note Taking to Bookmark Documents#
The Note Taking feature allows you to bookmark documents of interest for future reference.
There are two ways to bookmark documents:
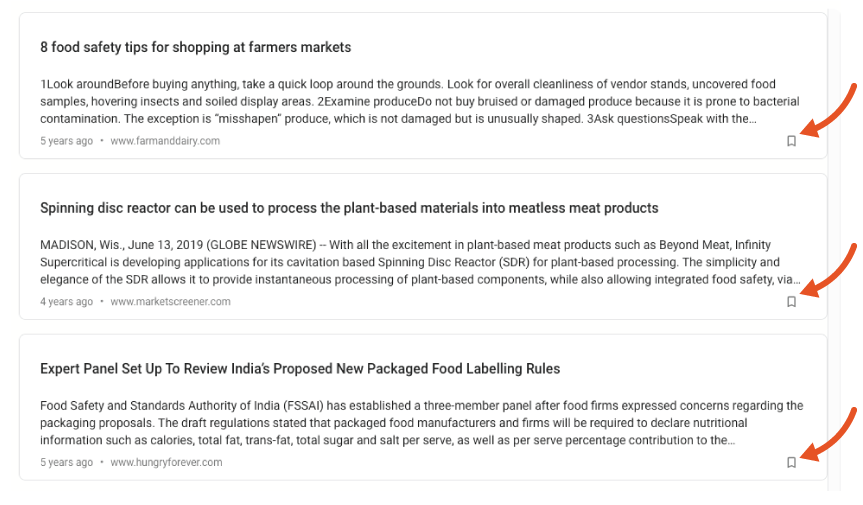
Clicking the bookmark icon that appears at the bottom of the document card in an items list, as shown below:
Clicking the bookmark icon that appears in the document view, as shown below:

Sentence-Level Notes#
Sentence-level notes allow users to add notes with comments to parts of a document’s text. These notes are private to the user who creates them and are not visible to other project users.
Note
Sentence-level notes can only be applied to documents that are indexed as PDFs by Squirro. See the section below on Note Taking and Document Types for more information.
To add a sentence-level note to a document, follow the steps below:
Highlight the text you want to add a note to in your document.
Click the bookmark icon that appears after selecting your text, as shown below:
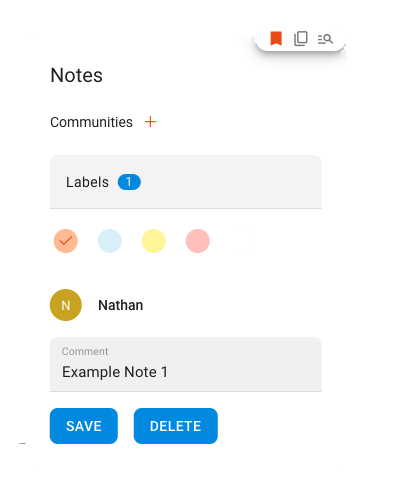
In the Add Note pop-up dialog that appears, select labels and/or communities to associate with your note (if desired), select a note color, add a comment (if desired), and click Save.
Note
Once you’ve added your first note, Add Note will become the default option selected when you highlight text in a document. To revert back to the default behavior, click the colored bookmark icon.
Note Options#
There are several options available to you when creating a new note:
Labels: You can select one or more labels to associate with your note. These labels will be added to the document when you save your note. See Labels for more information.
Communities: You can select one or more communities to associate with your note. See Communities for more information.
Color: You can select a color for your note. This color will be used to highlight the text you selected in your document. It’s up to you
Comment: You can add a comment to your note. This comment will be visible to you when you view the note in the Squirro UI.
Items Widget and Notes#
To display sentence-level notes using the Dashboard Editor, you must configure the Notes option within the Items widget.
To show sentence-level notes using the Items widget, follow the steps below:
Log in to your Squirro project.
Navigate to the Setup space.
Click the Visualization tab.
Hover over the dashboard you want to configure and click the Edit button.
Add the Items widget to your desired layer.
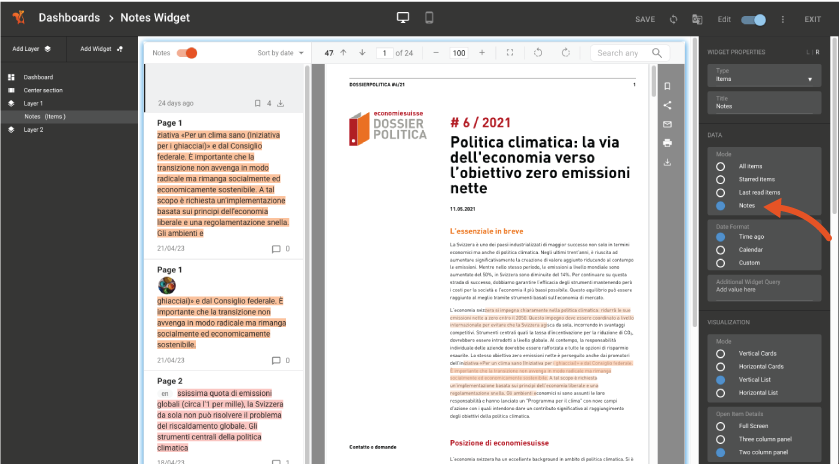
Check the Notes button as shown in the screenshot below:
Note Taking and Document Types#
The document-level bookmarking feature works with all types of documents.
However, sentence-level notes can only be created for documents that have been indexed as PDFs by Squirro.
This includes Office documents such as Word, Excel, and PowerPoint files, which are converted to PDFs by Squirro when ingested into your project.
Note
RSS feeds, CSV files, and other non-PDF document types do not support Notes.
Viewing Notes in the Document View#
When viewing a document in the Squirro UI, you can view all notes that have been created for that document in the Notes panel, as shown in the screenshot below:
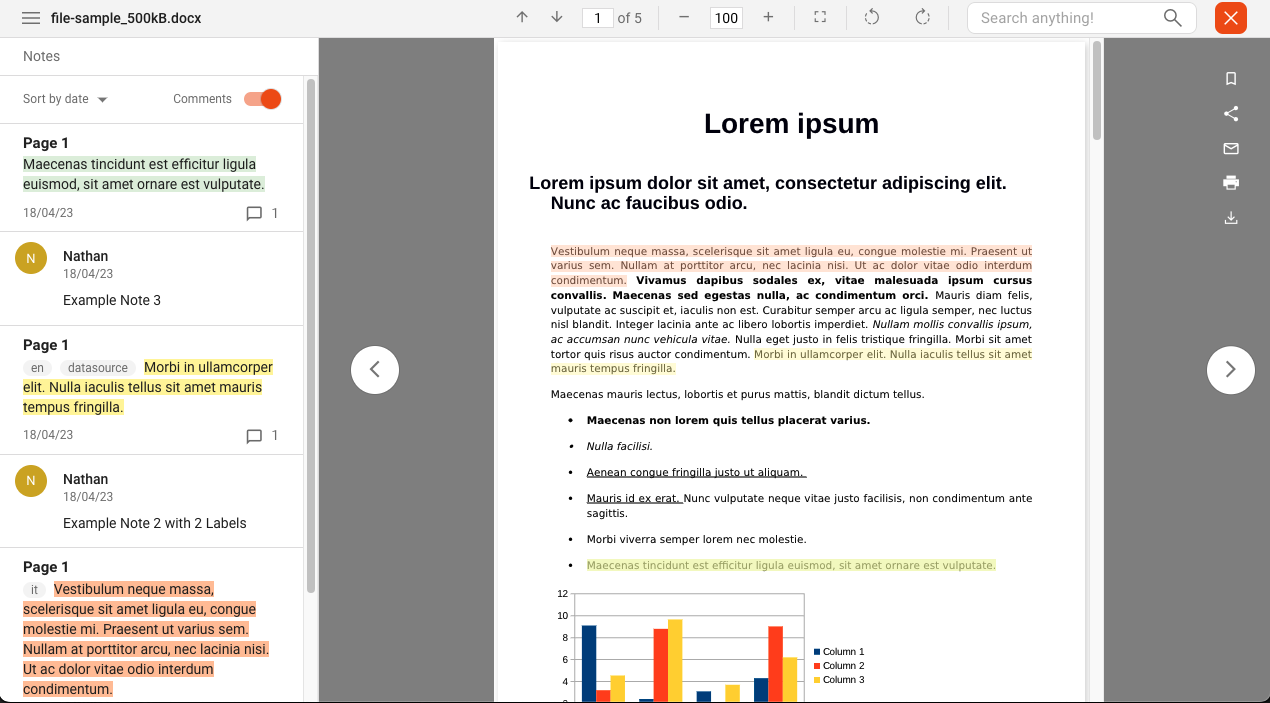
Tip
You can sort notes by date added, or by the document page they appear on, by selecting from the Sort by dropdown menu.
You can choose to show or hide note comments using the Comments toggle button.
Activating Notes#
By default, the Notes feature is turned off for all Squirro projects. It can be activated by anyone with project-level Administrator permissions. To learn more about permissions, go to the Squirro Roles & Permissions page.
To activate the Notes feature, follow the steps below.
Log in to your Squirro project.
Navigate to the Setup space.
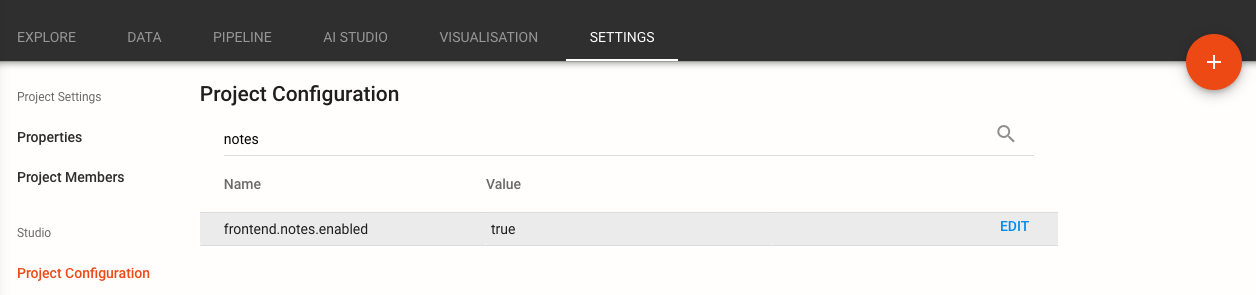
Click the Settings tab.
Click Project Configuration in the left menu.
Search for notes in the field at top, or scroll down until you see
frontend.notes.enabled.Hover over the config item to reveal the Edit button, then check or uncheck the box to turn the Notes feature on or off.