How to Use Bulk Labeling in AI Studio#
Profiles: Model Creator, Data Scientist
This page provides a step-by-step guide on how to use the Bulk Labeling feature in AI Studio.
Reference: To learn more about the feature itself, see Bulk Labeling.
Sentence versus Document-Level Bulk Labeling#
Bulk labeling works differently for sentence and document classification models.
For sentence-level classification, bulk labeling requires pre-defined proximity rules.
Reference: For more information on proximity rules, see the Proximity Filter documentation.
Once at least one proximity rule set has been created an validated, sentence-level bulk labeling can be applied.
Document-level models do not require proximity rules. (Proximity rules are not an available option for document-level models.)
How to Apply Document-Level Bulk Labeling#
To apply bulk labeling, start by opening AI Studio and follow the steps below:
Open the Ground Truths tab.
Click Bulk Label
Associate labels with candidate sets and click Label Data.
In the example screenshot below, taken from How to Create a Document-Level Classification Model in AI Studio, the goal of the model is a simple binary classifier that identifies whether documents are poultry-related or not:
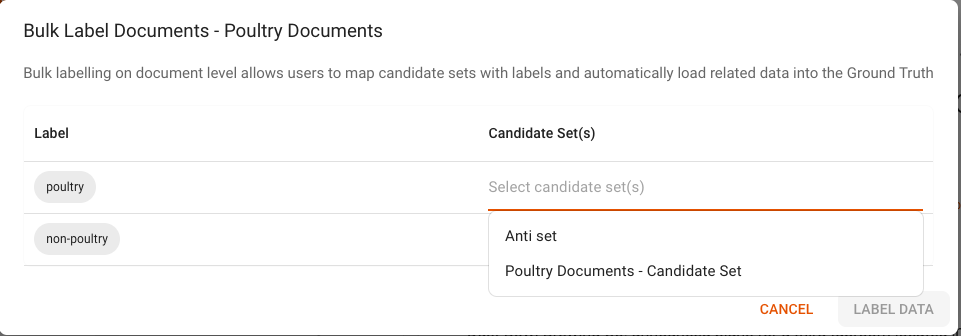
In the above example, two candidate sets were created, one that identifies poultry-related documents and one that identifies non-poultry-related documents.
These candidate sets were built using the following search queries
Poultry-related documents:
poultry OR chicken OR turkey OR goose OR fowlNon-poultry-related documents (the anti set):
NOT poultry OR NOT chicken OR NOT turkey OR NOT goose OR NOT fowl
Note
Document-level bulk labeling does not require an anti set. You could have multiple categories of food-related categories (beef, seafood, dairy, etc.) and build candidate sets for those, instead of Not Poultry. In that situation, you would have multiple labels associated with multiple categories to bulk label without an anti set.
How to Apply Sentence-Level Bulk Labeling#
Unlike document-level bulk labeling, with sentence-level bulk labeling an anti set is required.
To apply sentence-level bulk labeling, start by opening AI Studio and follow the steps below:
Open the Ground Truths tab.
Click Proximity Rules in the labeling section.
Ensure you have at least one proximity rule created. If not, click Create a Proximity Rule and create one.
Note
Proximity rules should be as short and to the point as possible to minimize noise. Proximity rules can be simple keywords.
Click Bulk Label.
Associate labels with candidate sets, check any boxes that apply, and click Label Data.