How to Load Data Using the UI#
Profile: Project Creator
Squirro offers multiple out-of-the-box options for connecting to internal and external data sources through the Squirro UI in your browser.
This guide is directed at Project Creators with access to their project’s Setup space and provides instructions for loading data using the UI.
If you’d prefer to work from the command line, see Data Loader Command Line Interface Tool Tutorial.
Prerequisites#
To connect data, you’ll need Administrator or Member project-level permissions. Other than that, the only requirement is that you have at least one data source ready to connect!
Reference: For more information on permissions, see Squirro Roles & Permissions.
How to Connect a Data Source#
To load data into your Squirro, you’ll need to connect at least one data source.
To do so, follow the steps below:
Navigate to the Setup space in your project.
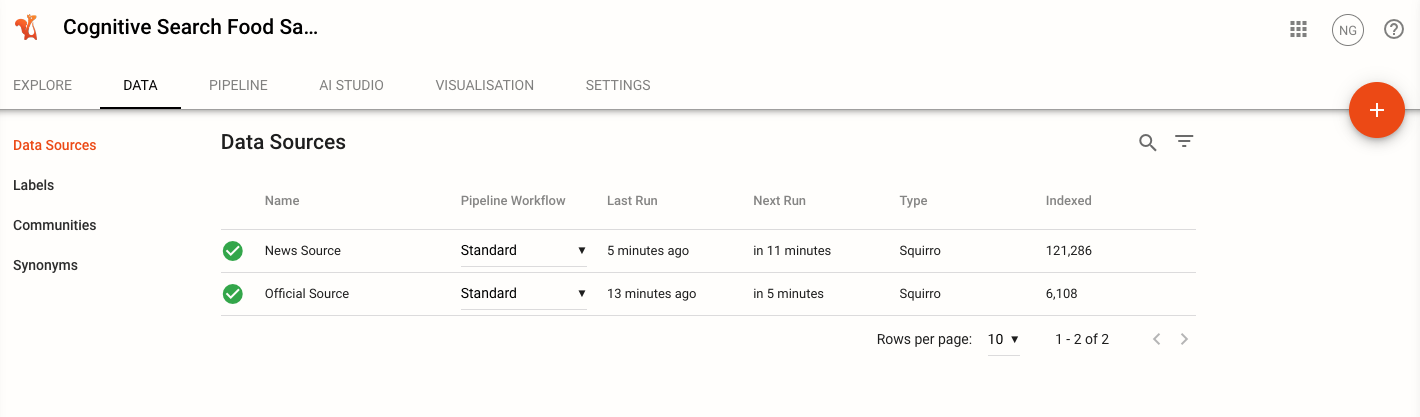
Click the Data tab.
By default, you’ll land on the Data Sources page. If your project has any connected data sources, you’ll see them listed here, as shown in the example screenshot below:
To connect a new data source, click the plus icon in the upper-right corner. This will open the Add Data Sources page, as shown in the example screenshot below:
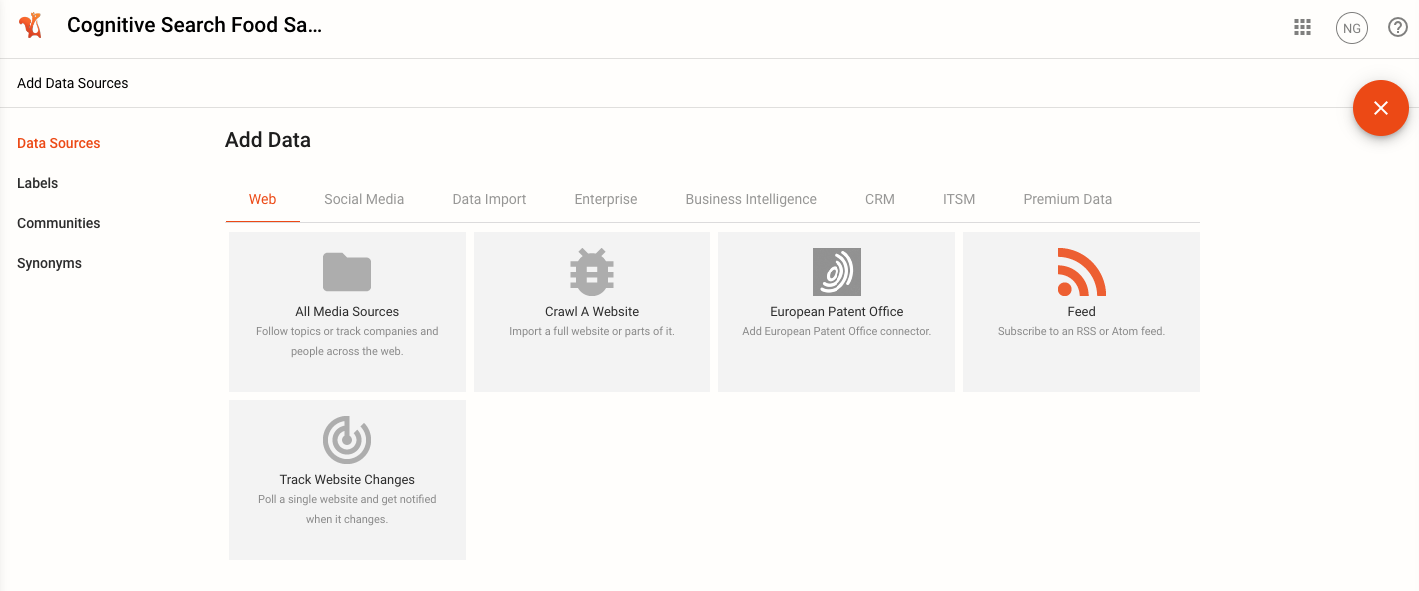
Select the tab with data source type you want to connect (see Built-In Data Connectors for information on different data source types).
Click the specific source type you’d like to use. This will open the Configure Source page.
Tip
Most users will start by connecting data using the Data Import tab, which allows you to upload ZIP, CSV, Excel, and Word files, amongst others.
The following section provides a walkthrough of the data source connection process, which typically is a four-step process involving Configuration, Map to Item Fields, Map to Labels, and Schedule Job.
1. Configure Source#
After clicking the specific source type you’d like to use, you’ll be taken to the Configure Source page, as shown in the example screenshot for loading a CSV file below:
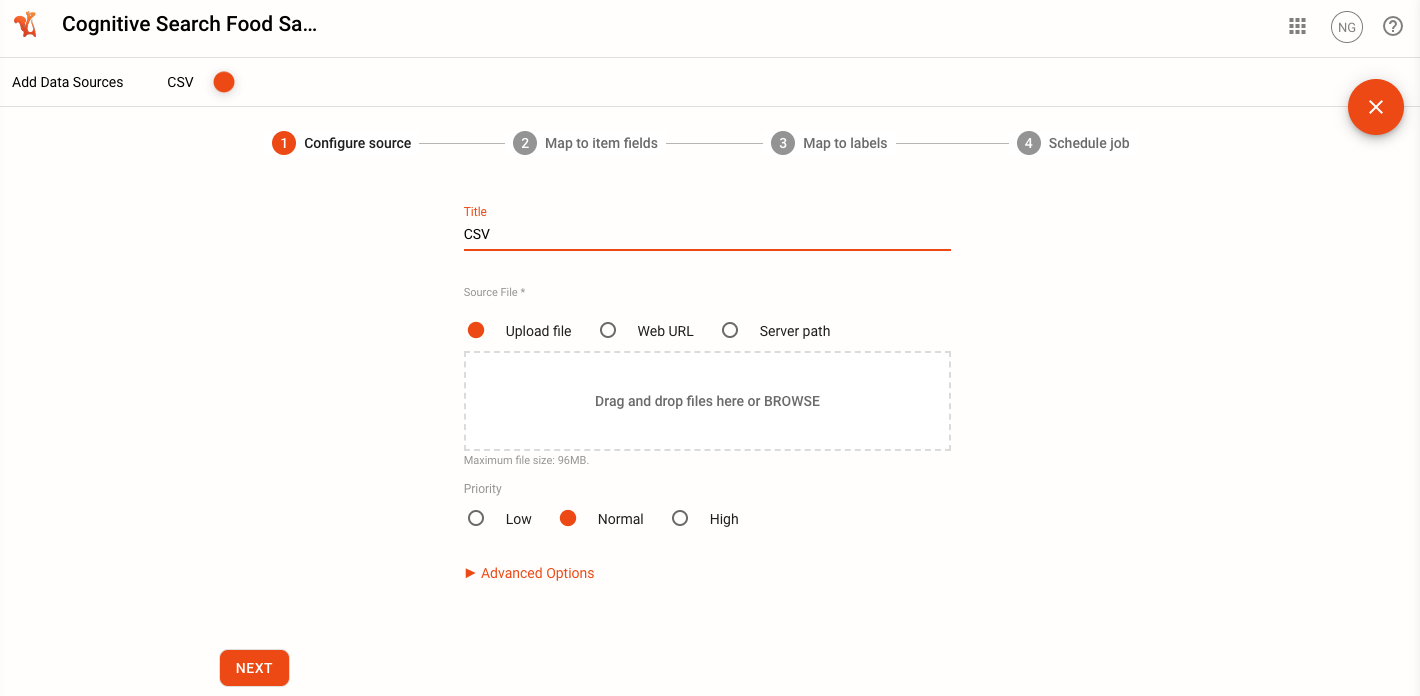
On this screen, you’ll need to provide the following:
Title: A name for your data source.
Source File: The file you’d like to load into Squirro. For this particular CSV example, you have the option to upload a file from your local machine, provide a URL to a file hosted on the web, or enter a server path.
Priority: The priority of the data source. This is used to determine the order in which data sources are loaded. The default value is Normal.
You’ll also have the option of expanding the Advanced Options section, which provides additional configuration options, as shown in the example screenshot below:

Once you’ve provided the required information, click Next to proceed to the Map to Item Fields step.
2. Map to Item Fields#
On the Map to Item Fields page, you’ll need to map the fields in your data source to Squirro Item fields.
At a minimum, you must map the Title and Body fields, though it’s recommended to map all additional available fields.
To do so, use the available drop-down menus to match fields, as shown in the example screenshot below:
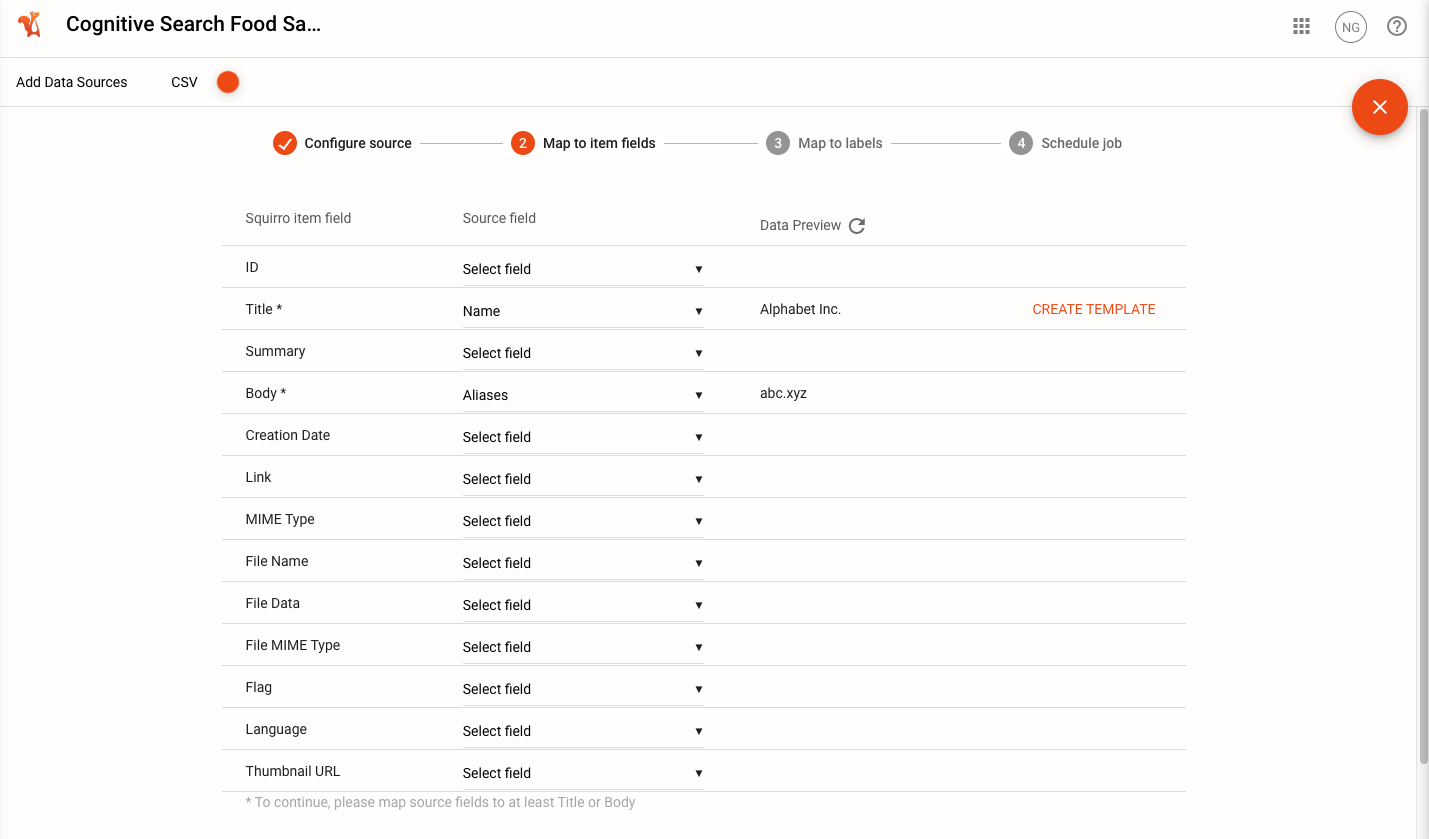
Once you’ve mapped your fields, click Next to proceed to the Map to Labels step.
3. Map to Labels#
On the Map to Labels page, you’ll need to map the fields in your data source to Squirro Labels.
To do so, use the available drop-down menus to match fields, as shown in the example screenshot below:
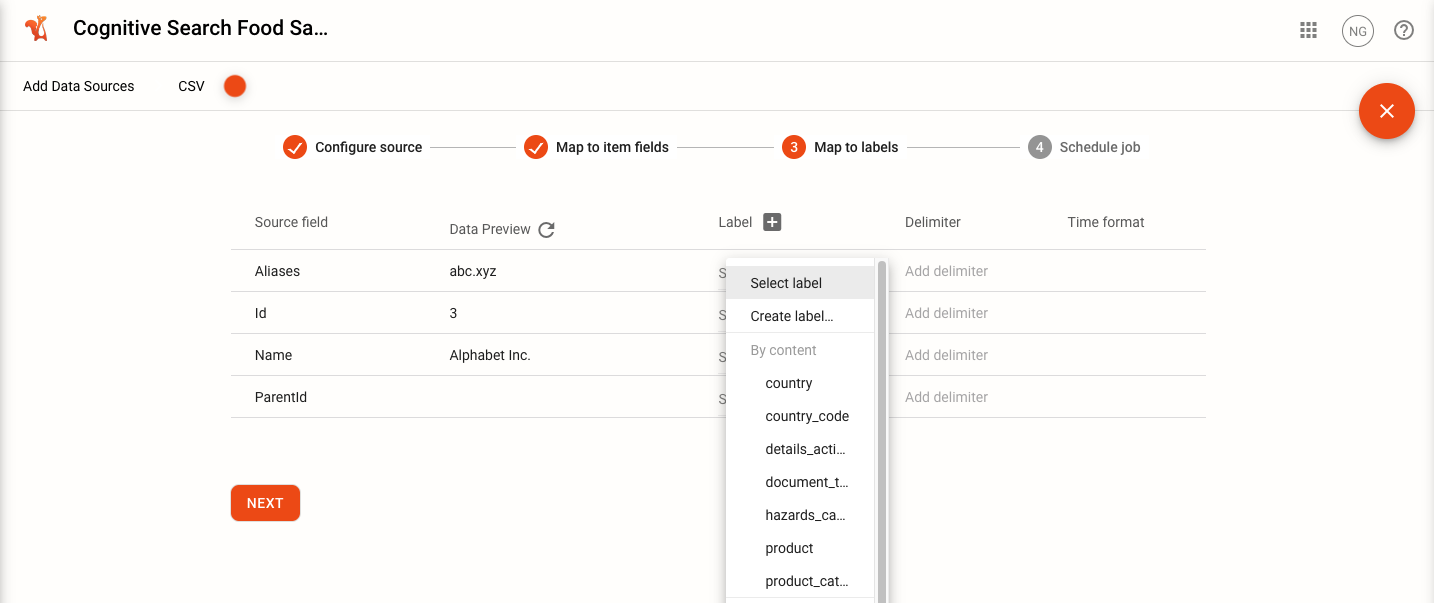
Once you’ve mapped your fields, click Next to proceed to the Schedule Job step.
4. Schedule Job#
On the Schedule Job page, you’ll need to configure batch sizing options and select the pipeline workflow, as shown in the example screenshot below:
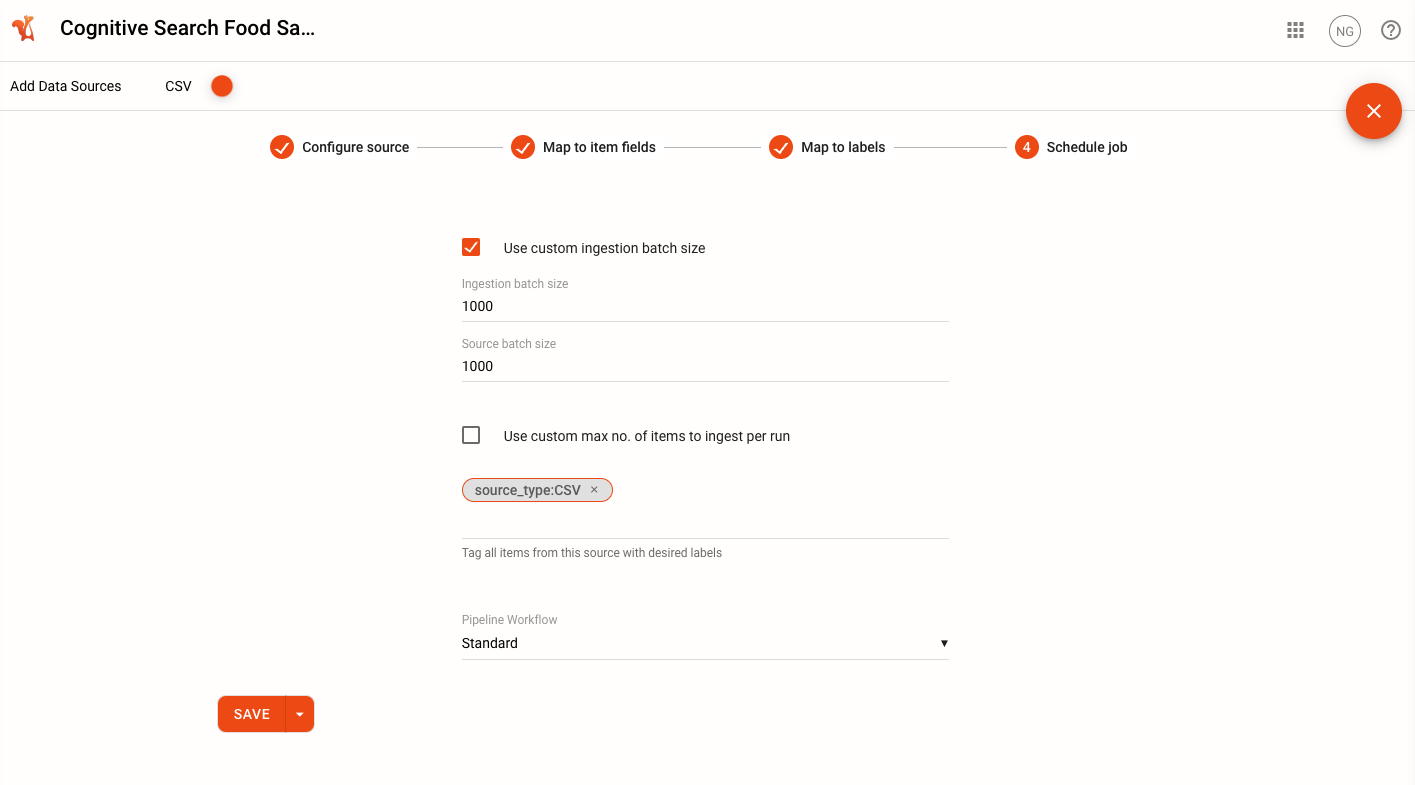
After clicking Save, you’ll be returned to the Data Sources overview page, where you’ll see your new data source listed.
Managing Data Sources After Load#
Once you’ve connected a data source, you can manage it by clicking the three-dot icon that appears when you hover over a data source.
This will open a menu with the options shown in the screenshot below:
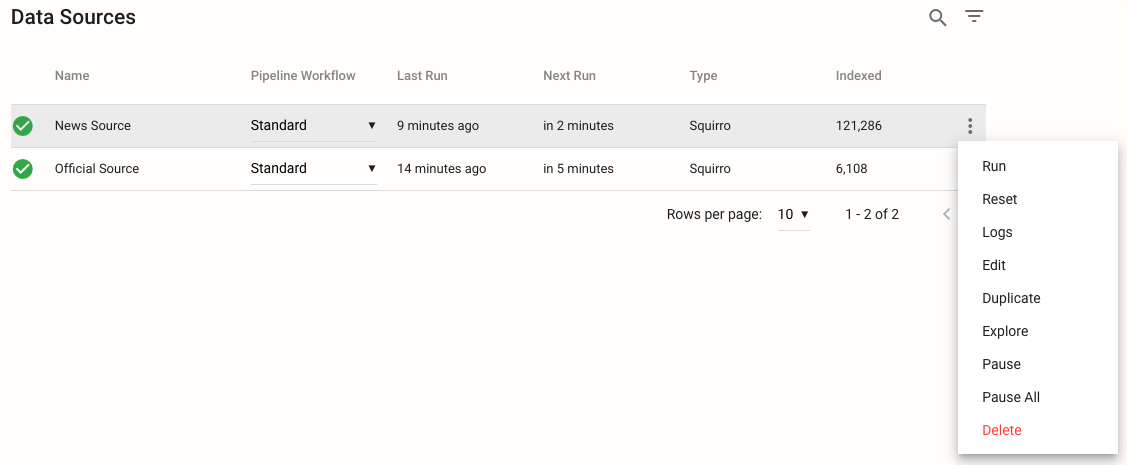
An explanation of each option is provided below:
Run: Run (ingest) the data source.
Reset: Reset the data source.
Logs: Opens a pop-up window showing the logs for the data source.
Edit: Open the editing screen for the data source.
Duplicate: Duplicate the data source’s configuration.
Explore: Open the Explore tab for the data source.
Pause: Pause the selected data source.
Pause All: Pause all data sources from running.
Delete: Delete the data source.