Communities Tutorial#
Profile: Project Creator
Communities is a feature that allows end users to follow topics that interest them within a Squirro project. In this tutorial, you’ll learn how to set up communities and associated Known Entity Extraction (KEEs) using the Squirro UI in your browser.
This tutorial is geared toward Project Creators and assumes familiarity with the basics of project creation, dashboard editing, and data loading.
Overview#
In this tutorial, you’ll perform the following steps:
Create a community type.
Add communities using an Excel file.
Configure the community type to automatically label ingested data with a KEE.
Load sample data.
Visualize communities.
Add a second new community type.
Rerun the pipeline to label data with your new community type.
Creating and Configuring a Community Type#
To create and configure your first community type, follow the steps below:
Click Setup in the top-right navigation menu.
Click the Data tab.
Click Communities in the side navigation menu.
Click Add Community or the plus-icon to create a new community type.

Fill in the fields as follows:
Field |
Description |
|---|---|
Name: |
Name the community type |
Choose a label to map to: |
Communities are linked (mapped) to a label. To set up this community type, you first want to create the label to which you’ll link the communities. Under Choose a label top map to select the option Create label…, then enter |
Upload file: |
Select Upload file and upload the following Excel file: |
Content labeling (Known Entity Extraction): |
Check the option to Automatically label ingested data with these communities and select Company names: optimized model to detect company names. |
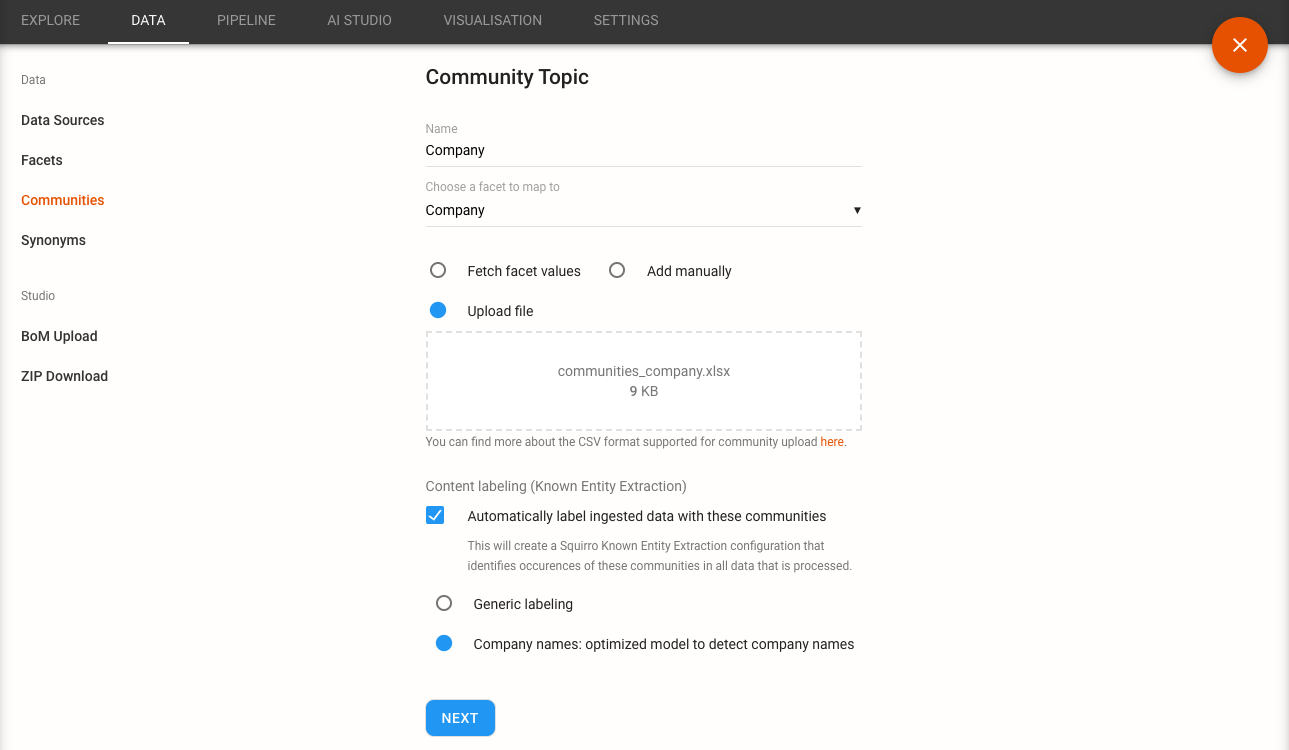
Click Next.
Tip: You may need to refresh the browser window or click Import to see the communities populate.
Load Data#
During the set up of the community type, you specified the option to create a KEE. As a result, the Community Type KEE is automatically added to all pipeline workflows and maps incoming data with the labels value specified in the uploaded Excel file.
Now, load the provided data to see this in action:
Reference: For more information about data loading, view Data Loading course offerings and resources at the Squirro Academy.
Visualize Communities#
You can now create a new dashboard to experiment with visualizing communities using the three primary community widgets by completing the following steps:
Click Setup in the top-right navigation menu.
Click the Visualization tab.
Click the orange plus icon to create a new dashboard.
In the Dashboard Properties, give the dashboard a title and enable the Right Section.
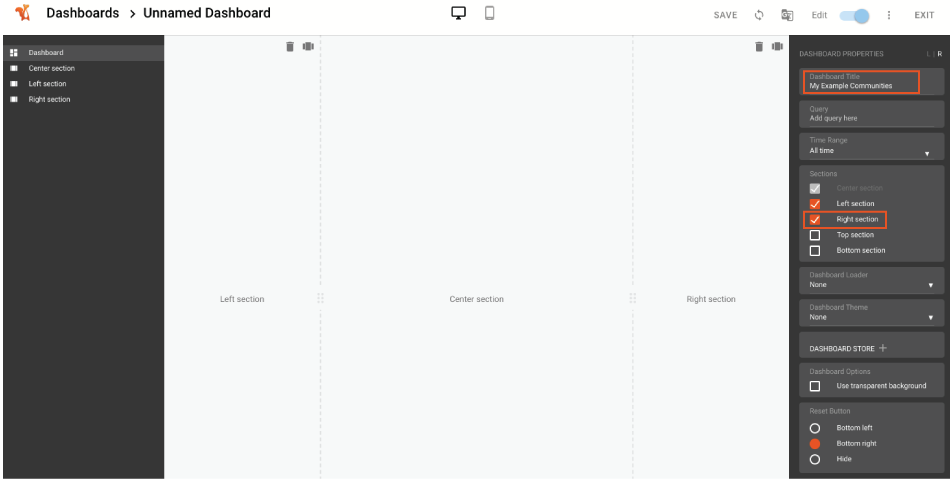
Reference: For a detailed overview of community widgets, see Visualizing Communities.
Left Section#
In this section, you’ll add a Tabs widget to visualize all the communities a user follows.
By default, when you create a new dashboard and open the Left Section, a Labels widget is pre-populated.
You can either delete the widget and replace it with a Tabs widget by clicking Add Widget and selecting or searching for Tabs, or you can edit the Labels widget and change the Type within Widget Properties.

Once you have a Tabs widget, scroll down and select the Show user Communities checkbox. This will visualize a user’s communities however you select.
For a narrow column like this, visualizing by Vertical tabs likely makes the most sense.
Reference: See Tabs for full configuration options.
Center Section#
With more space to work with, this section is a good candidate for the Community Items widget.
By default, when you open the Center Section, you’ll see a Rich Text widget and a Search Bar widget.
You don’t need the Rich Text widget, so replace it with a Community Items (or Headlines) widget by clicking Add Widget and selecting or searching for Community Items, or you can edit the Rich Text widget and change the Type within Widget Properties.
Resize the widget appropriately, and configure it as you’d like. Your widget should look something like the following example:
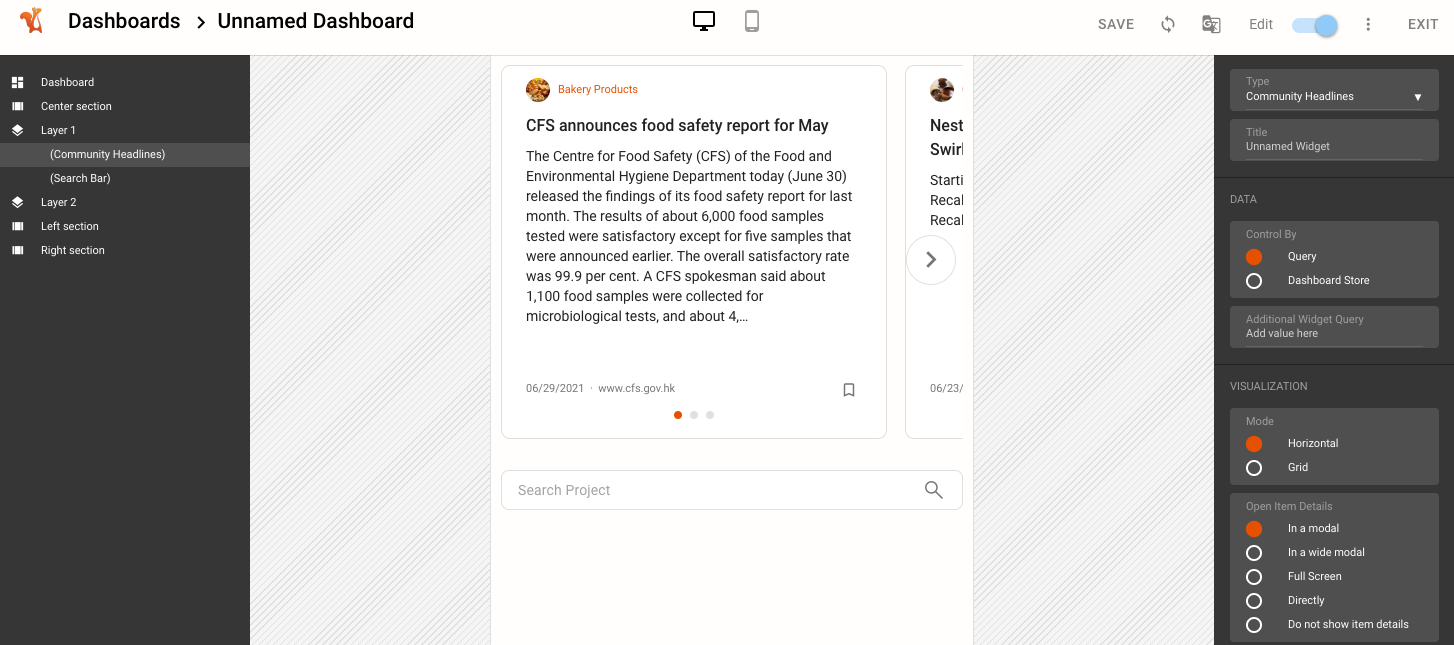
Reference: See Community Items for full configuration options.
Right Section#
Now you can add the final primary communities widget: Community List. This widget will list out available communities for users to follow or unfollow.
Click the Right Section, then click Add Widget and select or search for Community List. Drag it into place and resize to fit.
Configure the widget as you prefer. Your widget should look something like the following example:
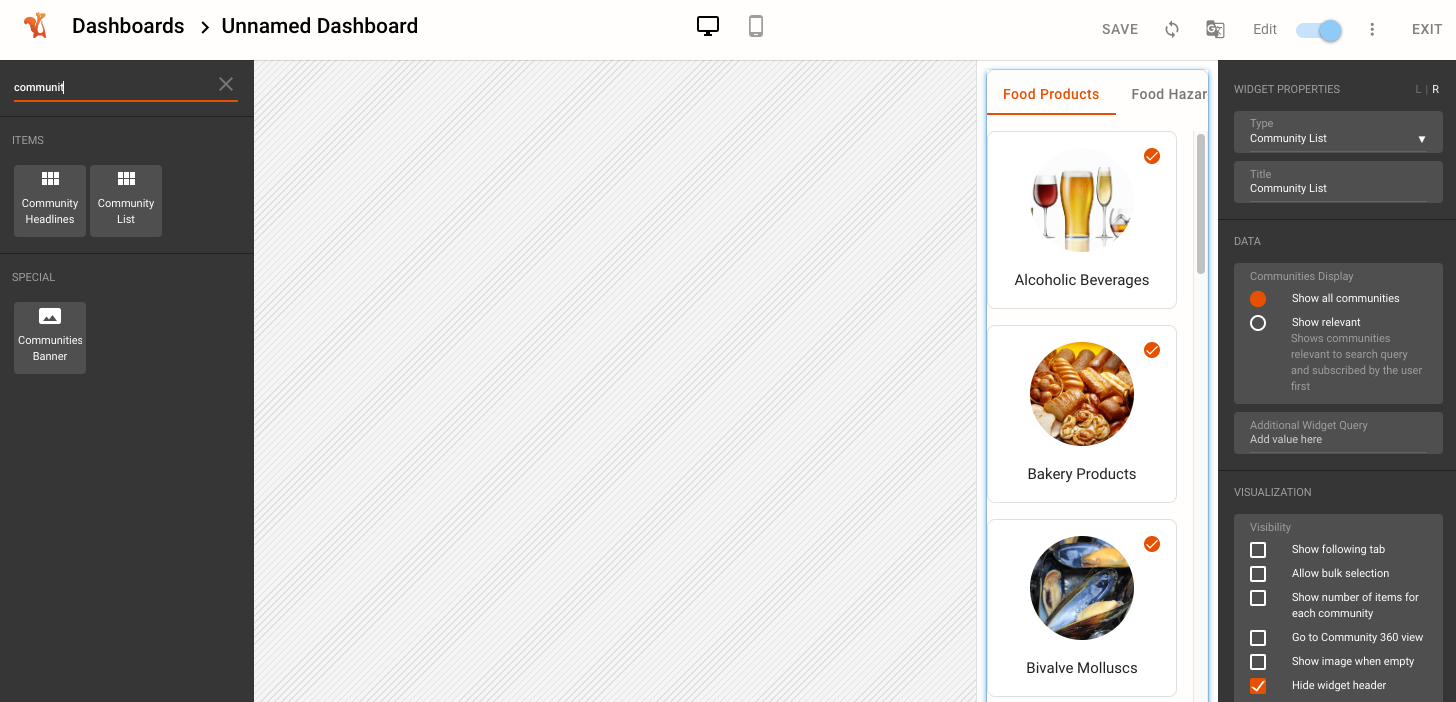
Reference: See Community List for full configuration options.
Add a Second Community Type#
Now, try adding another community type manually by following the steps below:
Click Setup in the top-right navigation menu.
Click the Data tab.
Click Communities in the side navigation menu.
Click Add Community or the plus-icon to create a new community type.
Note
Labels are termed facets in the Squirro code. Any time the code references facets, it is referencing what the UI calls labels.
Fill in the fields as follows:
Name: Name the community type
Person.Choose a label to map to: Communities are linked (mapped) to a label as described earlier. Under Choose a label to map to, select the option Create label… In the Add Label window, enter the Title
Personand Namepersonand click Save. This selects the newly-created labelPerson.- Upload file: Select Add manually and enter the following into the text box:
name,facet_value
Donald Trump,Donald Trump
Content labeling (Known Entity Extraction): Check the option to Automatically label ingested data with these communities and select Generic labeling.
Tip: You may need to refresh the browser window or click Import to see the communities populate.
Manually add a second community for Michael Lewis by clicking the Add button (next to the magnifier icon top right) and entering
Michael Lewisfor the name andmichaellewisfor the label.
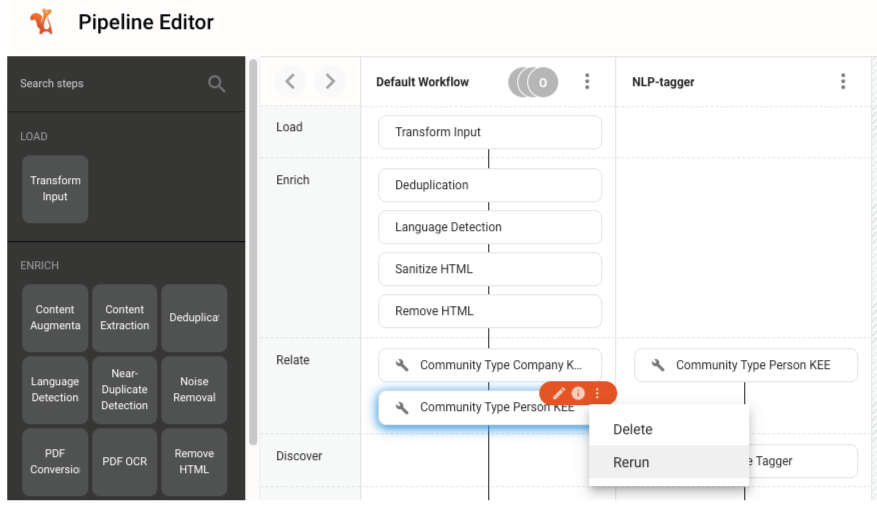
Now, to map the communities to existing data, you need to rerun the KEE that was created when you set up the communities.
Navigate to Setup > Pipeline
Click the orange pencil icon to enter Edit` mode.
Hover over the
Community Type Person KEEstep and click the three dots that appear.Click Rerun, leaving Run linked steps checked and the query field blank.
Congratulations, you’ve now created two different community types and generated communities!
After giving the pipeline a minute or two to run, go to your project dashboard and check for the newly added Person community.
Troubleshooting#
If something doesn’t seem to be working properly, how can I check for error messages?
Navigate to the project title in the upper-left corner (next to the Squirro icon), click to open the Projects menu, and then navigate to Squirro Monitoring. There you can investigate log files of issues occurring within your project.
