
How to Create a Squirro Custom Widget#
This guide will walk you through creating and deploying a Squirro custom widget.
Overview#
The primary audience for this content is frontend developers already familiar with JavaScript and React.
Reference: If you are comfortable with JavaScript but are not familiar with React, see Getting Started with React.
This guide is broken down into the following steps:
Establish the need and use case for a custom widget.
Determine if you will use an existing widget as a template, or create a new widget from scratch.
Create your custom widget.
Insert the custom widget into a dashboard within the Squirro UI using the Dashboard Editor.
1. Establish the Need for a Custom Widget#
Before building a custom widget, ensure that there is not an out-of-the-box widget that meets your use case needs.
You can browse available widgets in two ways:
By viewing a list of all out-of-the-box widgets on the Built-In Widgets docs page.
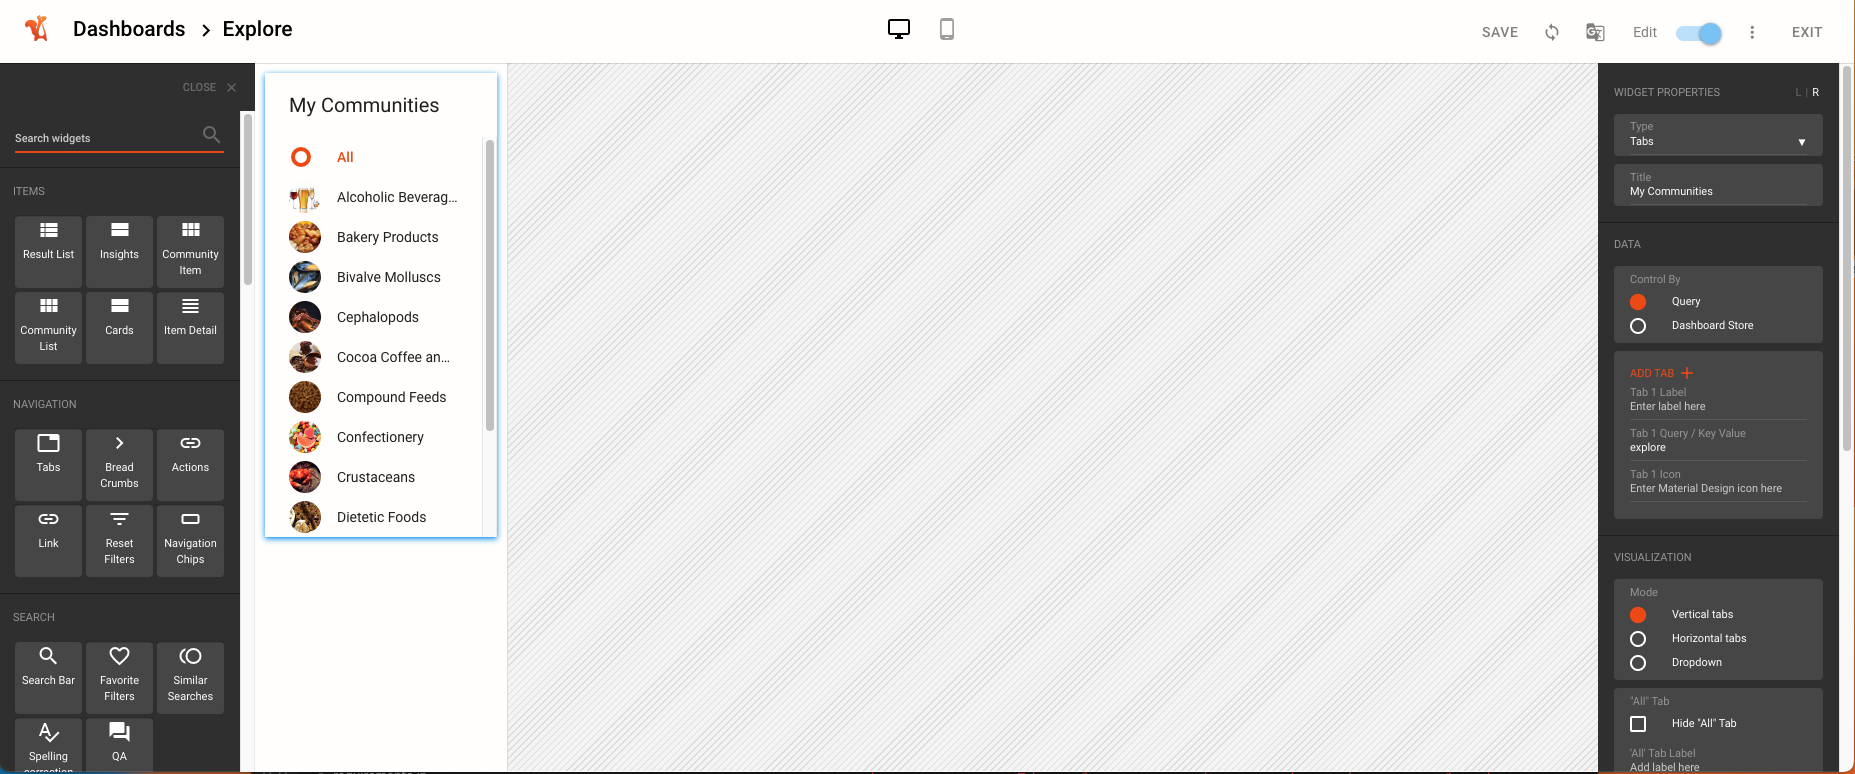
By opening the Dashboard Editor within a project, clicking the Add Widget button, and browsing the list of available widgets, as shown in the example image below:
Popular widgets for customization include the following:
2. Determine If You Will Use a Template or Create from Scratch#
There are two ways to create custom widgets:
Start with an existing widget and modify it to meet your needs.
Create a new widget from scratch.
Existing Widget as Template
If you are starting with an existing widget, you can use the existing widget as a template.
Reference: To browse a list of existing widgets, see Built-In Widgets.
Create a Widget From Scratch
If no existing widget meets your needs, you can create a new widget from scratch.
3. Create Your Custom Widget#
Custom widgets are built with React. Backbone custom widgets are no longer supported.
To create a custom widget, follow the steps below:
Open your Squirro project.
Navigate to the Setup space.
Click the Visualization tab.
Click Custom Widgets in the left menu.
Click the orange plus icon to create a new custom widget.
Select the widget to start from. To create a widget from scratch, select Base. To use an existing widget as a template, open the Items, Navigation, or Search tab and select that widget.
Enter a name, title, and description, and click Next.
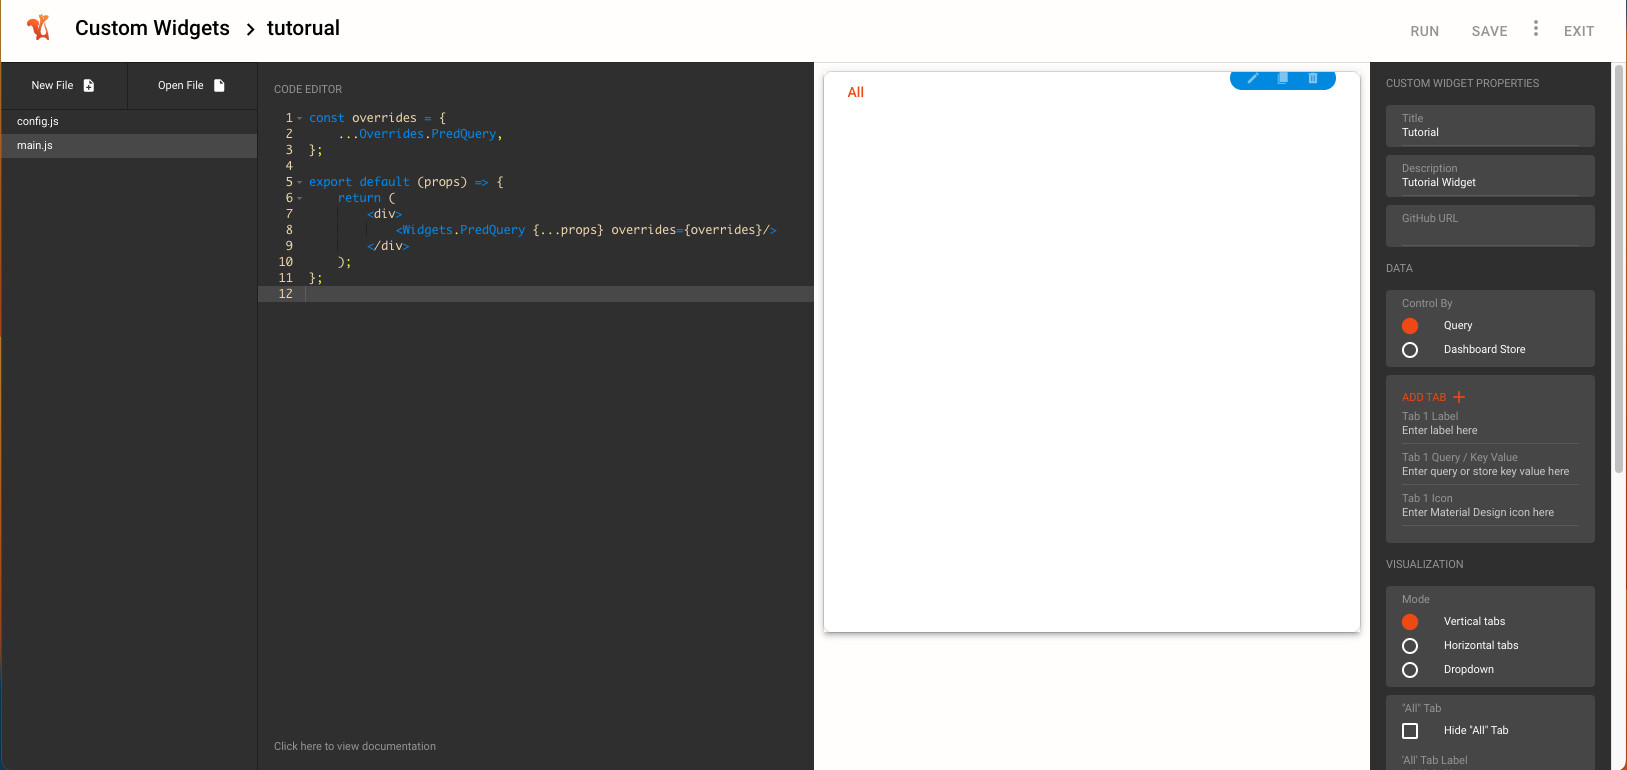
Create your widget using the React framework. See Creating React Custom Widgets for an understanding of the
main.jsandconfig.jsfiles and Styling React Components for guidance on styling your widget.
Additional Resources#
When creating a custom React widget within Squirro, it is also helpful to be familiar with the following resources:
You may also find the following how-to guides and walkthroughs useful:
4. Insert Your Custom Widget into a Dashboard#
Once you have created your custom widget, you can insert it into a dashboard within the Squirro UI using the Dashboard Editor.
To do so, follow the steps below:
Open your Squirro project.
Navigate to the Setup space.
Click the Visualization tab.
Hover over the dashboard you want to edit and click the Edit button.
Open a section and click the Add Widget button.
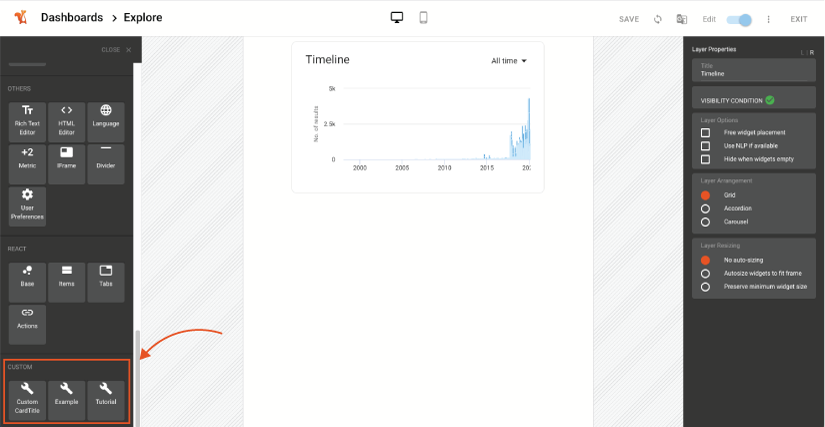
Your custom widget will appear in the list of available widgets at the bottom in the Custom section. Drag and drop the widget to add it to the dashboard.
Click Save to save your changes.
Open the dashboard in the Dashboards space to view your custom widget in action and verify everything is working correctly.
Reference: See Dashboards for more information about Squirro dashboards.