How to Connect Squirro Chat to a Third-Party LLM#
Profile: System Administrator
This page describes how system or project administrators, or anyone with access to the Server or Setup spaces of a Squirro Chat project, can connect their Squirro Chat application to a third-party LLM.
There are two steps involved in connecting to a third-party LLM:
Obtain the required LLM information from your third-party provider.
Configure your Squirro project or server settings to use your preferred LLM.
Reference: For information on connecting specifically to a Microsoft Azure LLM, see How to Connect Squirro Chat to a Microsoft Azure LLM.
1 - Obtain Third-Party LLM Information#
To set up Squirro Chat access to a specific third-party LLM, you will need to set up the LLM externally and record certain information for use in the Squirro Chat configuration (Step 2). Your third-party LLM information will be used to authenticate your Squirro Chat application when you attempt to connect it.
The information you’ll need will depend on the type of LLM you are connecting to. The table below outlines the information you’ll need for each type of supported LLM.
Model Type |
Required Information |
|---|---|
OpenAI |
|
Azure |
|
OpenAI-API |
|
Note
How you access this information will depend on your specific third-party LLM provider.
2- Configure Your Squirro Server or Project Settings#
You have two options in terms of configuring usage of the third-party LLM:
Configure your Squirro instance at the server level, meaning all existing and future Squirro Chat projects will use the third-party LLM you specify.
Configure your Squirro Chat application at the project level, meaning only that particular project you are working within will use the third-party LLM you specify.
When both server-level and project-level configurations are present, the project-level configuration takes precedence for that specific project.
Tip
Typically, Squirro recommends configuring your Squirro instance at the server level.
Configuring Your Squirro Instance at the Server Level#
Warning
In versions 3.10.0, 3.10.1, the server level configuration for the Squirro Chat application is not available. Please configure your Squirro Chat application at the individual project level.
Versions 3.10.2 and later#
To configure your Squirro instance at the server level, follow the steps below:
Log in to your Squirro instance.
Click on Server in the spaces navigation bar.
Click on Configuration.
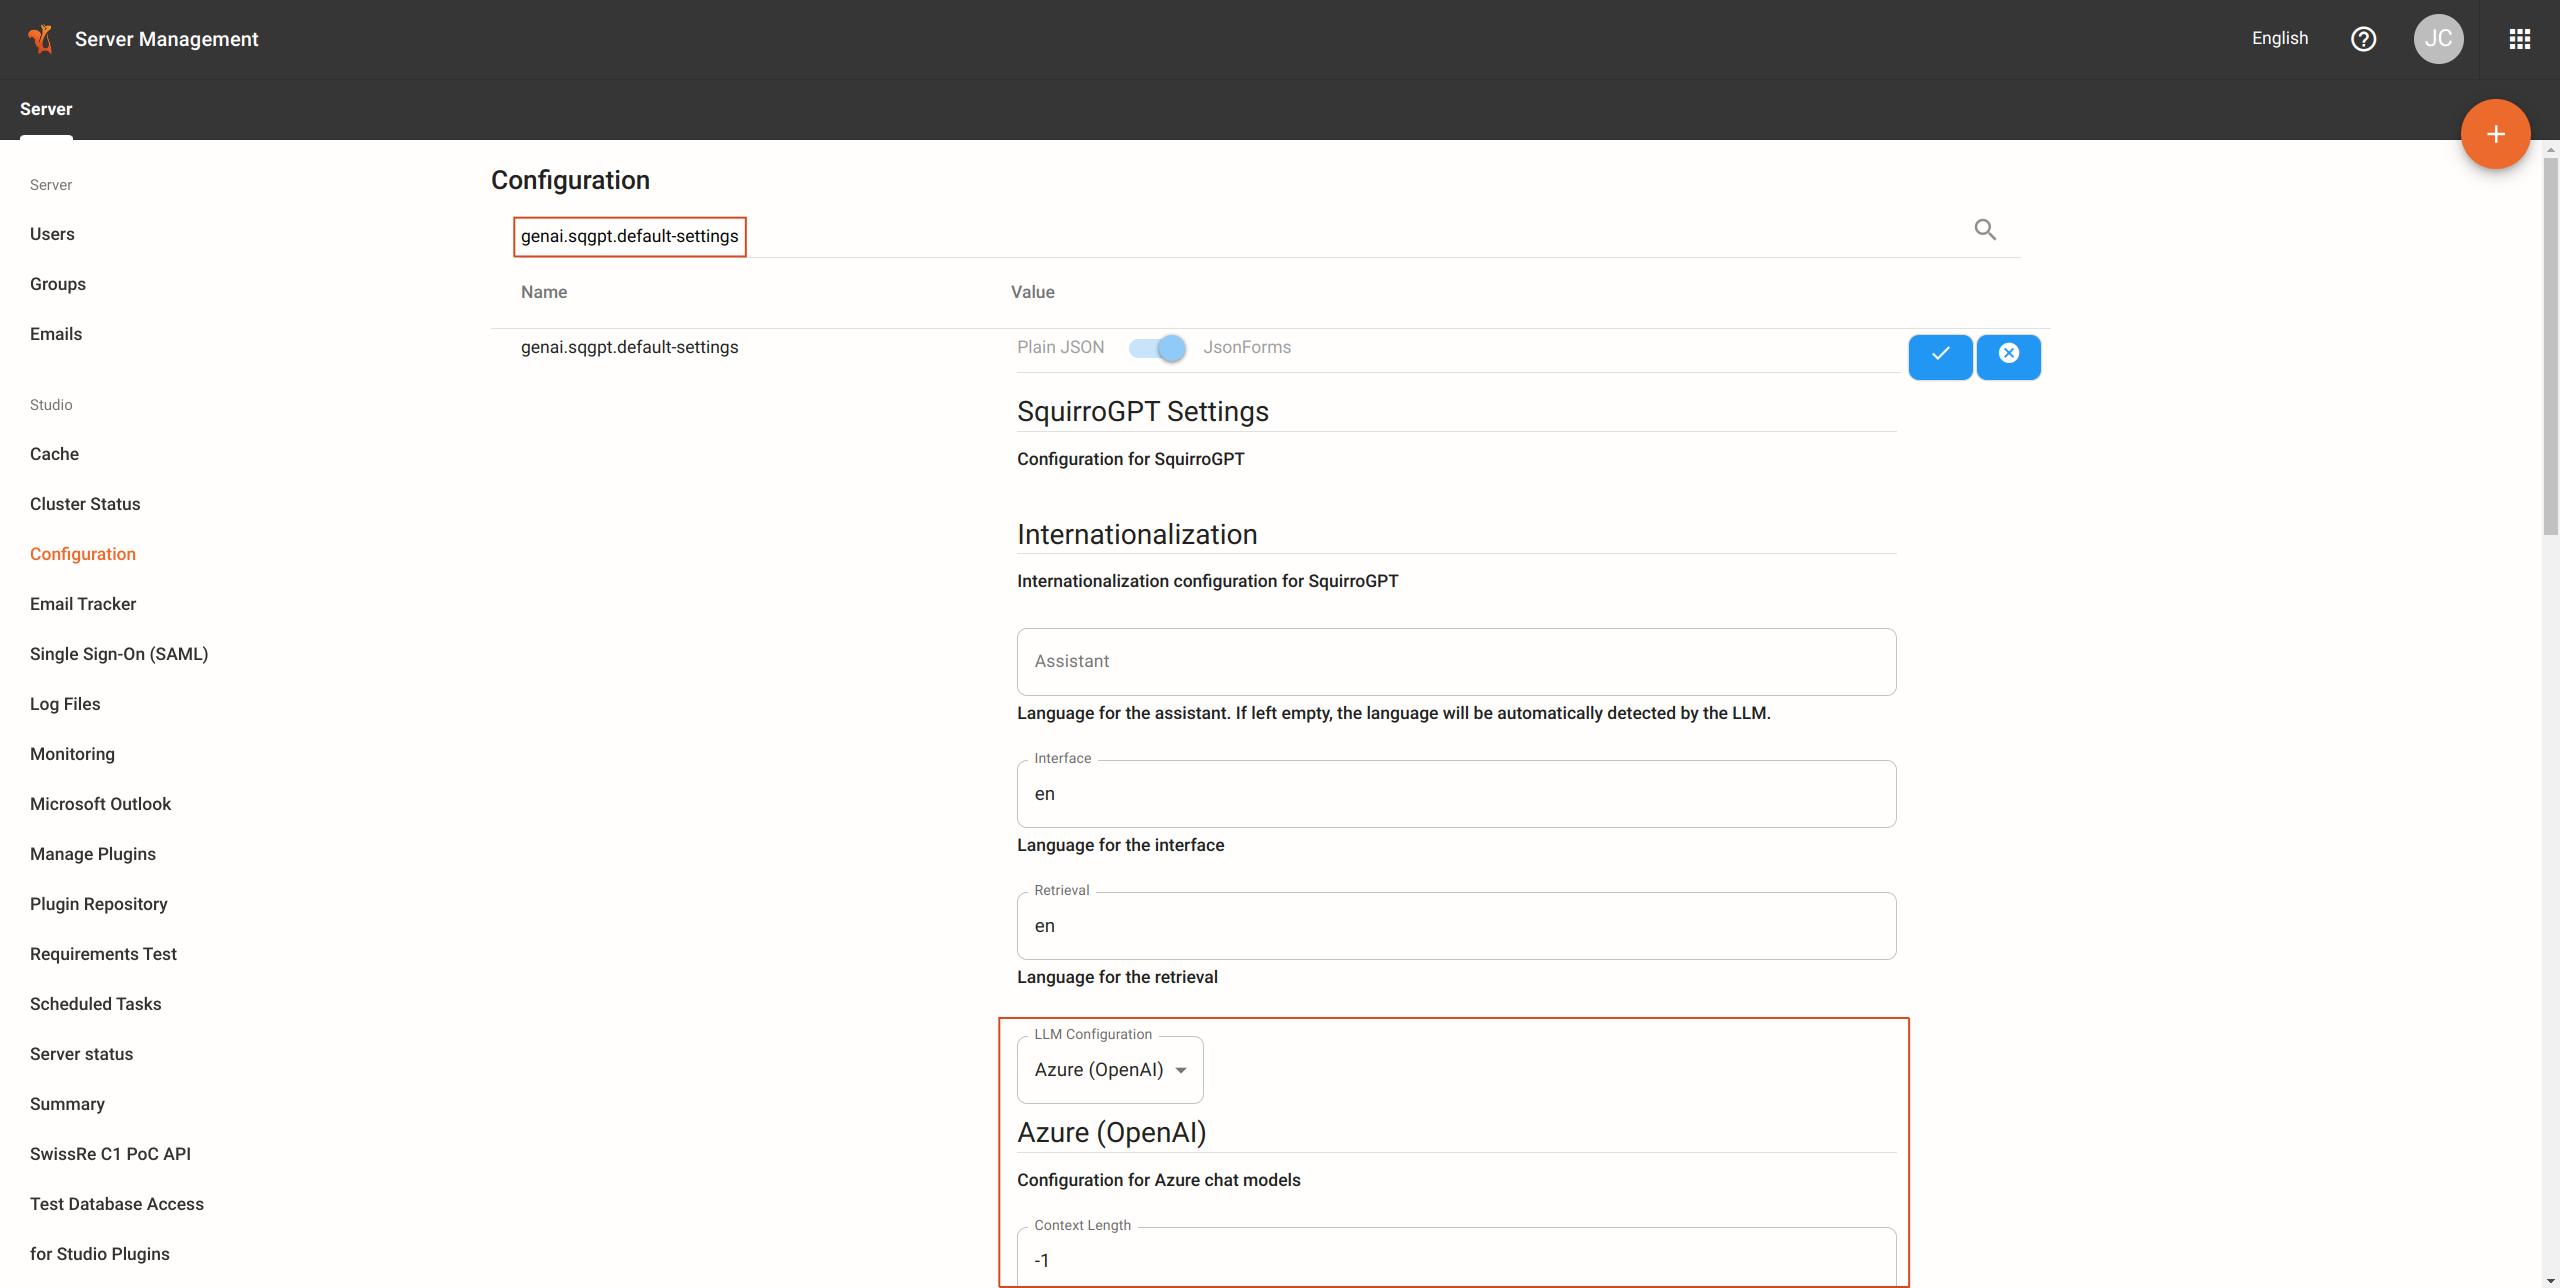
Search for the configuration named
genai.sqgpt.default-settings.Click on the edit icon to modify the configuration.
Adjust the default values appropriately as per the LLM Configuration Values section.

Versions 3.9.7 and earlier#
To configure your Squirro instance at the server level, follow the steps below:
Log in to your Squirro instance.
Click on Server in the spaces navigation bar.
Click on Configuration.
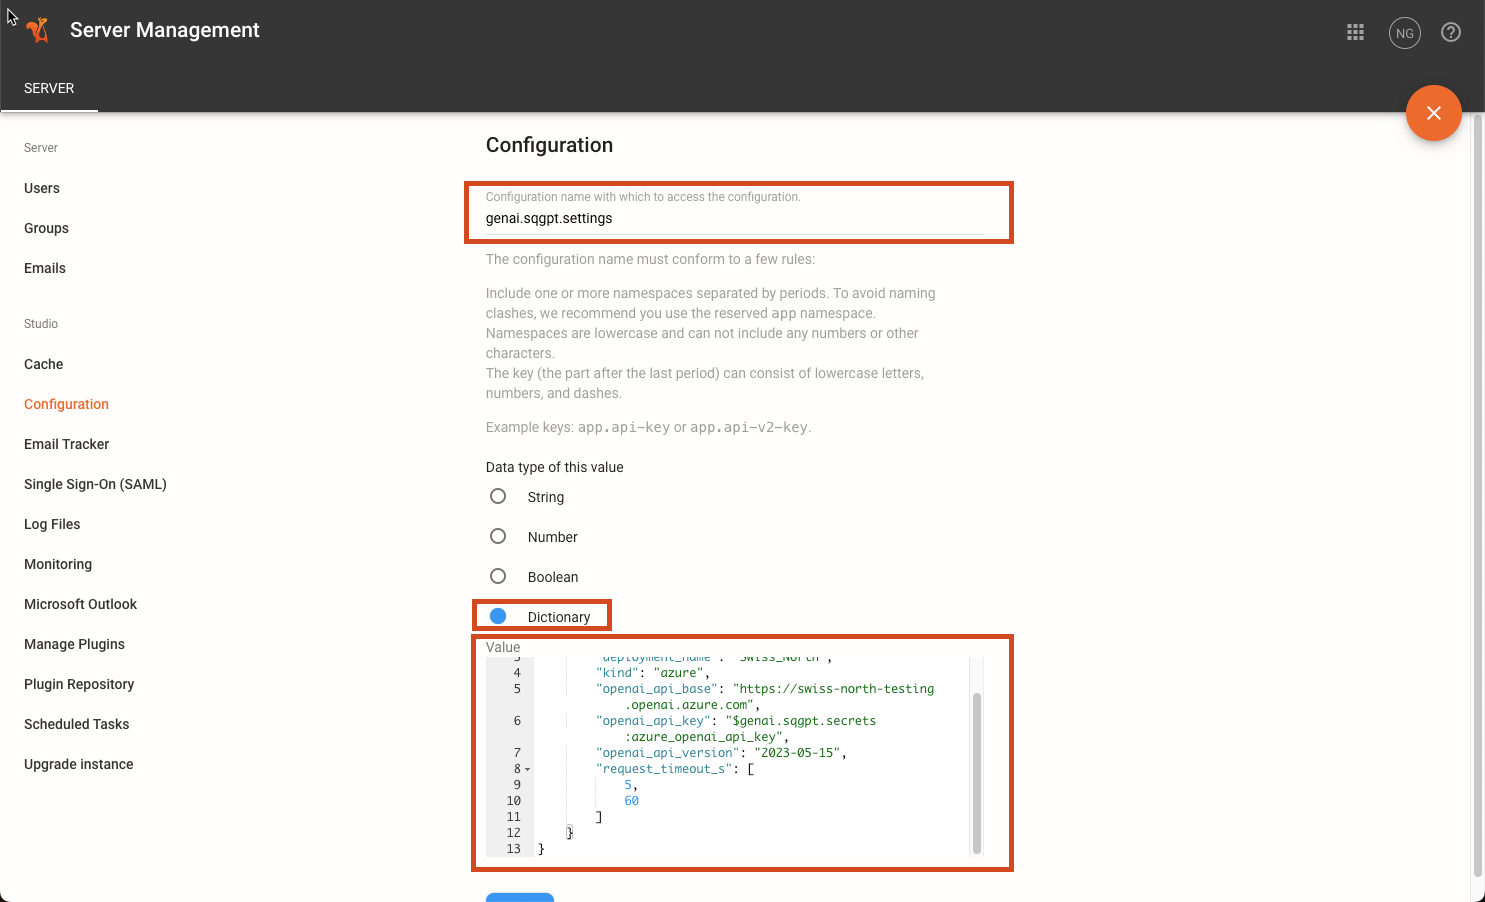
Click on the plus icon to create a new configuration. (See note below if you have previously created a configuration.)
Enter the following name:
genai.sqgpt.settings.Select Dictionary as the data type.

Paste the appropriate values as per the LLM Configuration Values section.
Note
If you have already created the genai.sqgpt.settings configuration, you can simply edit the existing configuration and paste the above value.
Configuring Your Squirro Chat Application at the Project Level#
Versions 3.10.0 and later#
To configure your Squirro Chat application at the project level, follow the steps below:
Log in to your Squirro instance.
Click on Setup in the spaces navigation bar.
Click on Settings.
Click on Project Configuration.
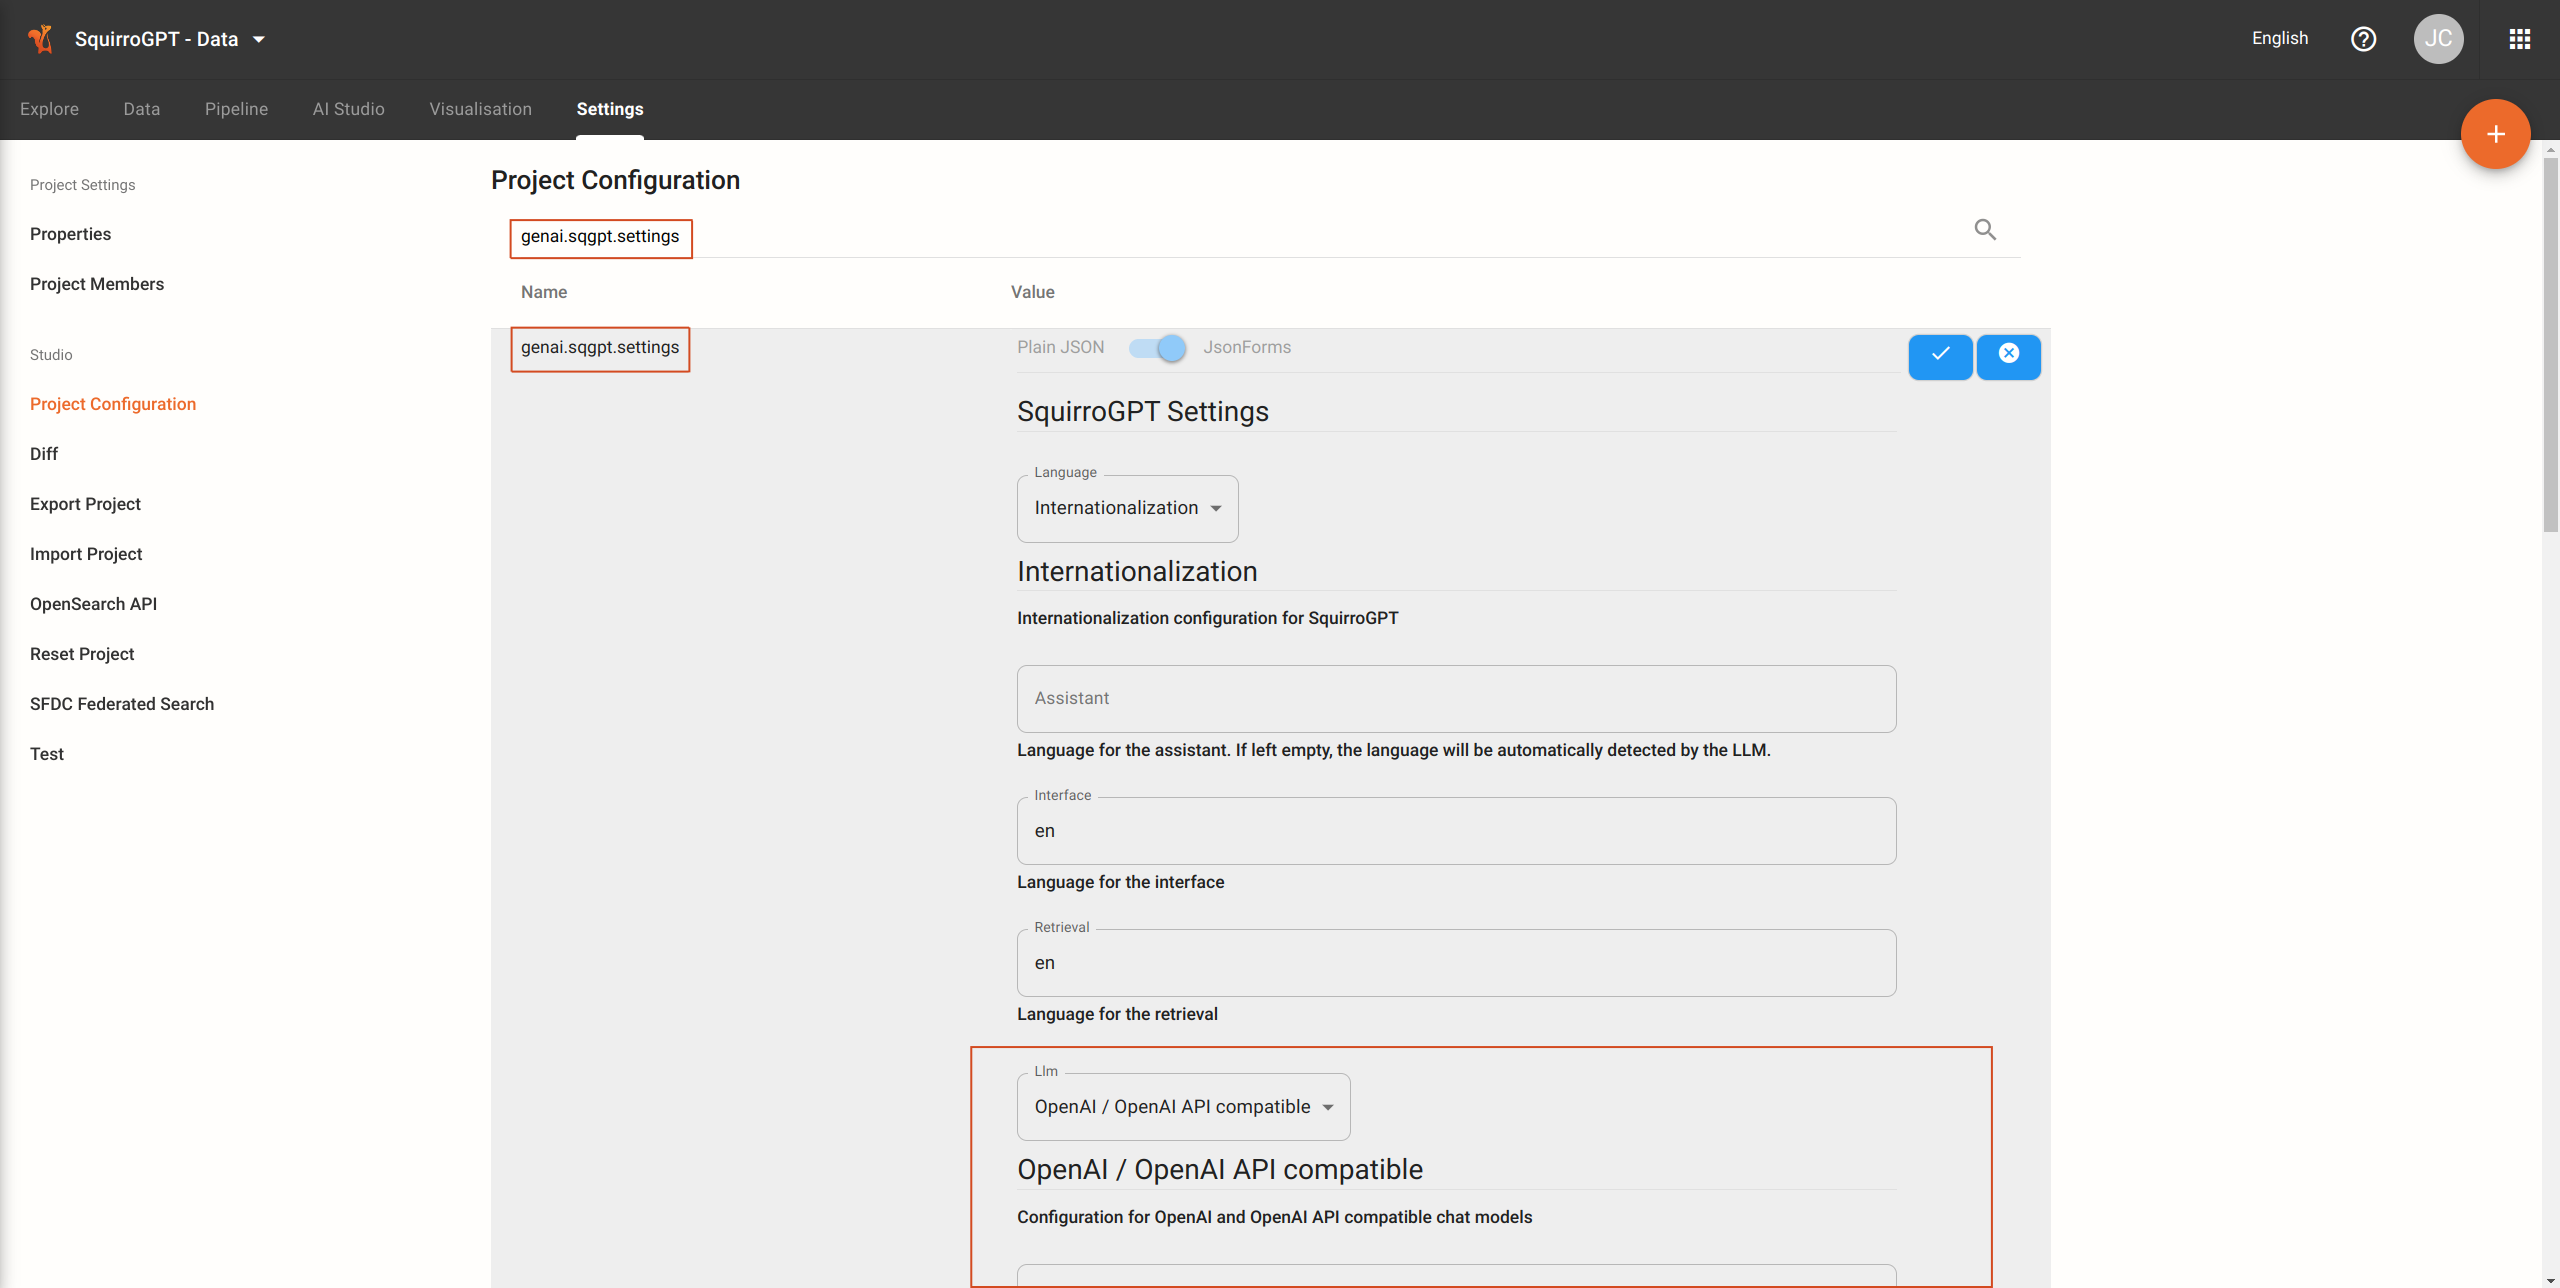
Search for the configuration named
genai.sqgpt.settings.Click on the edit icon to modify the configuration.
Adjust the default values appropriately as per the LLM Configuration Values section.

Versions 3.9.7 and earlier#
To configure your Squirro Chat application at the project level, follow the steps below:
Log in to your Squirro instance.
Click on Setup in the spaces navigation bar.
Click on Settings.
Click on Project Configuration.
Click on the plus icon to create a new configuration. (See note below if you have previously created a configuration.)
Enter the following name:
genai.sqgpt.settings.Select Dictionary as the data type.

Paste the appropriate values as per the LLM Configuration Values section below.
Note
If you have already created the genai.sqgpt.settings configuration, you can simply edit the existing configuration and paste the above value.
LLM Configuration Values#
The following values are to be used in either Step 7 or Step 8 above, depending on whether you are configuring your Squirro instance at the server level or your Squirro Chat application at the project level.
To properly configure your Squirro instance or project, you will need to paste the appropriate values for your third-party LLM into the configuration that you collected in Step 1.
Configuration for OpenAI Models#
{
    "llm": {
        "kind": "openai",                          # Indicates OpenAI model (required)
        "openai_api_key": "<your OpenAI API key>", # Your OpenAI API key (required)
        "model": "gpt-3.5-turbo"                   # Model name (optional, default is "gpt-3.5-turbo")
    }
}
Configuration for Azure-hosted OpenAI Models#
{
    "llm": {
        "kind": "azure",                           # Indicates Azure-hosted model (required)
        "deployment_name": "<your deployment>",    # Your deployment name (required)
        "openai_api_base": "<your base URL>",      # Base URL for the API (required)
        "openai_api_key": "<your Azure API key>",  # Your Azure API key (required)
        "openai_api_version": "2023-05-15"         # API version (optional, default is "2023-05-15")
    }
}
Note
For more detailed information on connecting to a Microsoft Azure LLM, see How to Connect Squirro Chat to a Microsoft Azure LLM.
Configuration for OpenAI-API Compatible Models#
{
    "llm": {
        "kind": "openai",                          # Indicates OpenAI-API compatible model (required)
        "openai_api_key": "<your API key>",        # Your API key (required)
        "model": "<your model>",                   # Model name (required)
        "base_url": "<base URL of provider>"       # Base URL of the model provider (required)
    }
}
Example: Example configuration for Mixtral deployed on Anyscale:
{
    "llm": {
        "kind": "openai",
        "openai_api_key": "<esecret_…>",
        "model": "mistralai/Mixtral-8x7B-Instruct-v0.1",
        "base_url": "https://api.endpoints.anyscale.com/v1"
    }
}
Note
For Anyscale deployments, you can alternatively set kind to anyscale. This automatically sets the base_url to https://api.endpoints.anyscale.com/v1.
Timeout Configuration for Reasoning Models#
Some advanced language models, such as OpenAI GPT-5 with medium or high reasoning levels, require significantly more processing time to generate responses. These reasoning models perform extended analysis before providing their output, which can result in response times that exceed the default timeout settings.
To accommodate longer response times, you need to increase the frontend.sqgpt.default-timeout configuration. This setting controls the overall timeout for all Squirro Chat functionality.
Server Level Configuration
Navigate to Server → Configuration
Search for
frontend.sqgpt.default-timeoutEdit the configuration and increase the value (in milliseconds)
Project Level Configuration
Navigate to Setup → Settings → Project Configuration
Search for
frontend.sqgpt.default-timeoutEdit the configuration and increase the value (in milliseconds)


